Pages

Wednesday, February 28, 2018

Certain Cars Can Be Banned From Streets, Court Rules. Total Ban By 2040?

Image source: Pixabay.com The country where the internal combustion engine originated might be among the first to ban it. Germany’s Federal Administrative Court ruled Tuesday that cities have the right to ban gasoline and diesel vehicles in an attempt to curb pollution. “These vehicles have no place in our cities anymore,” Jürgen Resch, the managing […]

The post Certain Cars Can Be Banned From Streets, Court Rules. Total Ban By 2040? appeared first on Homesteading Alliance.

Can Non-Maple Trees Be Tapped For Syrup? Yes!

Image source: Pixabay.com Tapping trees for sap and making homemade syrup is an easy and delicious component of being a homesteader and raising one’s own food. The three issues that often stymy beginners, however, revolve around the trees themselves. People new to tapping often struggle with being able to tell sugar maples from other maples, […]

The post Can Non-Maple Trees Be Tapped For Syrup? Yes! appeared first on Homesteading Alliance.

How to Disinfect Seed Trays

Sometimes I have a hard time being flexible. I’ve been like that for as long as I can remember… If we had something on the calendar growing up, it was gonna happen. No ifs, ands, or buts about it. And if it didn’t? Well, I pretty much had a meltdown. I’ve grown out of the […]

The post How to Disinfect Seed Trays appeared first on Homesteading Alliance.

Tuesday, February 27, 2018

Citizen-Journalist Arrested For Facebook Post About Police

Image source: Pixabay.com A Texas woman might face time in jail after being slapped with two felonies because she posted something she heard from an acquaintance on her Facebook page. “In my opinion, this is the government’s attempt to silence my client,” Priscilla Villarreal’s attorney, Sergio Lozano, told The Texas Monthly. Villarreal was arrested by […]

The post Citizen-Journalist Arrested For Facebook Post About Police appeared first on Homesteading Alliance.

5 Things Made Better In Your Grandparents’ Time You Can Find In Thrift Stores

The trope of “things were better in the good old days” is often just that. An empty trope of viewing the past through rose-colored glasses of idealism and bias, which clouds our judgment of the future and present day. We can certainly agree that great strides have been made in science, medicine, technology and social […]

The post 5 Things Made Better In Your Grandparents’ Time You Can Find In Thrift Stores appeared first on Homesteading Alliance.

Growing Gourds: How to Plant, Grow, and Harvest Gourds

A few years ago, my mother-in-law showed up at our house with a bag of seeds. They were meant to grow gourds. Well, I had no idea what I was doing, but I put them in the ground and away they went. Over the years I’ve invested in different types of gourds and began seeing […]

The post Growing Gourds: How to Plant, Grow, and Harvest Gourds appeared first on Homesteading Alliance.

5 Uses For Wood Ash You’ve Probably Never Considered

Image source: Pixabay.com People have been using wood ash for as long as they have been building fires. From writing, to making soap, wood ash can be an invaluable staple to have on the homestead. What is wood ash? Also referred to as pot ash, wood ash is the leftover byproduct from burning wood, not […]

The post 5 Uses For Wood Ash You’ve Probably Never Considered appeared first on Homesteading Alliance.

Monday, February 26, 2018

5 Cutting Edge Off Grid Homes With Modern Amenities

Off-grid homes present an opportunity for people to connect with nature and be one with the environment – a sharp contrast to the reality many people face today in cities around the world. People are waking up to the negative effects the stressful city environments have on humans. There is increased interest in helping people […]

The post 5 Cutting Edge Off Grid Homes With Modern Amenities appeared first on Homesteading Alliance.

The Perfect Carbine-Pistol Package That Will Fill All Your Gun Needs

If you like compact and maneuverable carbines in the hot 22 WMR rimfire cartridge, then the Kel-Tec CMR-30 is for you. When Kel-Tec introduced the CMR in .22 WMR, it added another player to their lineup of lightweight, compact rifles. There’s a lot to love about this little gun, and if you combine it with […]

The post The Perfect Carbine-Pistol Package That Will Fill All Your Gun Needs appeared first on Homesteading Alliance.

Their Radical Plan To Off-Grid, Debt-Free Living Worked. Here’s What They Did.

Jocelyn and Jarvis knew they would have to make some radical changes in their lifestyle if they were going to get out of debt, but they did not know that those changes would put them on a different path altogether. In order to pay off their $96,000 debt from student loans, credit cards and the […]

The post Their Radical Plan To Off-Grid, Debt-Free Living Worked. Here’s What They Did. appeared first on Homesteading Alliance.

7 Ways The Old-Timers Knew It Was Time To Tap

Image source: Pixabay.com Tapping trees to make syrup is an annual late-winter-into-spring tradition for many homesteaders. One of the keys to a successful syruping season is timing, and as is true with many homesteading activities, timing is all about the weather. Nowadays, we have weather satellite information readily available at the touch of a screen, […]

The post 7 Ways The Old-Timers Knew It Was Time To Tap appeared first on Homesteading Alliance.

Sunday, February 25, 2018

Growing Peas: How to Plant, Grow, and Harvest Green Peas

Green peas are the absolute bomb! Why might you ask? Well, because when you can plant green peas, that usually means that growing season is beginning. You’ll be planting the rest of your garden shortly between direct sowing or starting seeds for it. Also, it means that you will have fresh homegrown vegetables in your […]

The post Growing Peas: How to Plant, Grow, and Harvest Green Peas appeared first on Homesteading Alliance.

Home Canning Equipment You Need (and where to get it cheap!)

When it’s time to start preserving your garden produce, many homesteaders turn to canning. Canning your food makes it shelf and pantry stable, can easily be stored for a year or more, and meals are heat and eat. If the power is out, you can still consume your home canned food, just open the jar […]

The post Home Canning Equipment You Need (and where to get it cheap!) appeared first on Homesteading Alliance.

31 Delightful DIY Gift Ideas for Your Best Friend

A best friend is a person who means the world to you. Sometimes, you want to give them something special, and what is more special than a handmade gift from the heart? One of my best friends is having her birthday in a few days and I am wanting to come up with something special […]

The post 31 Delightful DIY Gift Ideas for Your Best Friend appeared first on Homesteading Alliance.

Saturday, February 24, 2018

25 Inspiring Homemade DIY Terrarium Ideas You Can Make Today

Having always been a fan of having various bits of greenery dotted around my house, this is not my first time dabbling with terrariums. That being said, I have never attempted to make one myself, I have always bought them or received one as a gift. I have a particularly beautiful one that my mom […]

The post 25 Inspiring Homemade DIY Terrarium Ideas You Can Make Today appeared first on Homesteading Alliance.

8 Best Plant Food Reviews: The Formula to a Healthy, Abundant Harvest

Grow your own deliciously fresh fruit, vegetables, herbs and vibrant flowers with a nutrient-rich plant food. Whether you are a newbie or a professional gardener or grow indoor or outdoor plants, a complete plant food mix that contains essential minerals and nutrients will create a healthy eco-system that will help your plants to survive and […]

The post 8 Best Plant Food Reviews: The Formula to a Healthy, Abundant Harvest appeared first on Homesteading Alliance.

City Forces Gun Stores And Other Businesses To Buy Security Cameras, Record Customers

Image source: Pixabay.com Gun store and other business owners are now required to install security cameras to help law enforcement in Saginaw, Mich. The new ordinance in the city requires most businesses to install at least three security cameras by March 1, 2019. The cameras will take pictures of the face of every person entering […]

The post City Forces Gun Stores And Other Businesses To Buy Security Cameras, Record Customers appeared first on Homesteading Alliance.

Son Gets Ill And Misses School. Mom Lands In Court.

A school district tried to prosecute a Pennsylvania mom because her son’s health problems kept him from attending school – and the school didn’t back down until an attorney got involved. The controversy began when Leslie Sacks’ son entered high school and began having anxiety attacks. The mom kept him home “numerous days” while she […]

The post Son Gets Ill And Misses School. Mom Lands In Court. appeared first on Homesteading Alliance.

Friday, February 23, 2018

Growing Stevia: How to Plant, Grow, and Harvest Stevia Plants

Do you enjoy growing your own herbs every year? Well, what if I told you that you could grow a healthy sweetener option as well? Thanks to stevia you can. Now, stevia is great for people with diabetes who need to avoid sugar or those that just don’t want the extra calories. But how do […]

The post Growing Stevia: How to Plant, Grow, and Harvest Stevia Plants appeared first on Homesteading Alliance.

6 Clever, Off-Grid Ways To Cook When There’s No Electricity

Image source: Pixabay.com You may not think of it this way, but the vast majority of the food we eat is cooked. Oh, it may not actually be cooked in your kitchen, but it was cooked somewhere. Frozen foods, breakfast cereal, cookies, bread, potato chips, dry-roasted peanuts, candy, spaghetti sauce, lunchmeat and even some canned […]

The post 6 Clever, Off-Grid Ways To Cook When There’s No Electricity appeared first on Homesteading Alliance.

19 Vegetable Garden Plans & Layout Ideas That Will Inspire You

Are you ready to plant your garden, but are feeling a little unsure of how to lay it out?

Well, it seems everyone faces that dilemma each year. The reason is that there are so many different ways to lay out your garden.

Then you have to consider what your goal for your vegetable garden is. Do you want it to give some produce but also care about aesthetics? Are you more interested in getting the most produce possible from your garden?

After you decide what your primary goal for your vegetable garden is, then scroll through the garden designs I’ve gathered from all over the internet and see which options work the best for you.

Simple Vegetable Garden Plans

Here are the vegetable garden plans:

1. Raised Garden Bed Gardening Plans

These plans are amazing. The reason is that they take each raised garden bed into account and lay it all out to scale.

Then you can see that they incorporate the purpose of each vegetable as well. For instance, you’ll see they are growing multiple beds of tomatoes.

However, they label the tomatoes that are meant for sauce, the tomatoes meant for sandwiches (or slicers), and also incorporate the other vegetables they plan to grow in smaller amounts.

Which is why this thorough layout would be a great place to start if you are planning on gardening in raised beds this year.

2. Pallet Garden Plan

If you want to grow a smaller garden, then you might want to consider this method. You have one raised garden bed.

Then you put a pallet on the backside of the bed to allow vegetables to grow up it for support. This should be a frugal option as well.

From there, you’ll need to know how to make the most of your garden bed. This layout gives you a square for each vegetable grown.

As you can see, you can have quite a variety of vegetables growing in one bed. This would be an excellent option for those who live in suburban areas with smaller yards.

3. The Multi-Bed Garden Plan

This garden plan is another exact layout. It incorporates multiple beds. This means that you can grow a ton of food and different varieties, too, because they won’t be in the same bed.

Which is great because you can grow everything from vegetables, to flowers, to large sunflowers in one garden.

Also, it offers a plan for companion plants as well. You’ll notice that when you see a mixture of vegetables and flowers. People usually do this to keep pests at bay, but be sure to do your research to check for accuracy.

4. 5,000 Square Foot Vegetable Garden Plan

Do you need to grow a lot of food? I understand because I have to produce a ton of food every year to feed my family.

However, it can be challenging to plan out where everything should go. Thanks to this layout, it doesn’t have to be complicated this year.

In fact, you can see where she has made room for everything from vegetables to fruits to nuts. You name it; you can probably find a way to make it work in this garden.

5. Garden Planner #3

I am in love with this garden plan because it looks neat and tidy. It also doesn’t waste any space when filling in the garden.

However, it doesn’t look overcrowded. It has a nice balance to it and seems like it would be easy to maintain.

When you need a garden plan that will hold a lot of food and look good too, then you’ll want to consider this layout.

6. Intensive Garden Plan for Maximum Harvest

This is another garden plan that I love. The reason is that it has the garden layout for spring, summer, and fall.

Also, I like how it can fit a lot of variety into one medium sized garden space.

However, the drawback is that the image has a key that you must translate. That isn’t all that difficult, but it isn’t as simple as some either.

7. 4×4 Foot Square Foot Gardening

Square foot gardening is a great way to be able to fit a variety of vegetables into one vegetable garden space. Which is why I love this layout.

Also, I love how plain the design is. It is easy to follow and see what is going on. It makes planting a small garden very simple.

Plus, it also shows you proper placement of vegetables to keep everything from overlapping or stunting growth.

8. Summer Vegetable Garden Plan

Are you working on a smaller plot and need to know how to arrange everything? This plan is for you then.

This design includes everything from vegetables to herbs. It also looks nice, since you have the shorter items in the front.

Followed by the taller and cascading items in the back. It would add some charm to your yard.

9. Fall Vegetable Garden Plan

If you are stumped as to how you should arrange your fall garden, then check this plan out. It is easy to read and includes all of your necessary fall vegetables.

But my favorite part about this design is that it includes everything in a lot of detail. You have the trellis where you are supposed to grow peas.

Then you have lots of fresh greens and carrots thrown in the mix as well. It is a great design that embraces simplicity.

10. Spring Vegetable Garden

This garden design has a lot of detail included in it as well. You can tell that the creator had the thought of aesthetics and not just production.

But if you live in a suburban area, then you know that how your garden looks can often matter to those around you and your HOA.

Which is why this layout might be conducive to many. Also, it includes lots of fresh vegetables that are spread out uniquely.

11. Auntie Dogma’s Garden Design

Auntie Dogma knew what she was talking about when she created this garden layout. It is effortless to read, and she explains why she chose to place items in certain places.

But if you are also looking for a helpful resource on growing and planning your first garden, then this could be a useful resource.

Whether you need background or just a garden design idea, most will find this a valuable resource.

12. Companion Planting Layout

I already mentioned a little above that many people plan out their garden using companion planting. This is when you plant certain plants together that will compliment or protect each other just by being in close quarters.

Well, this is what this layout is all about. They tell you which vegetables they are growing this year and where they will plant.

Then they show which plants compliment each other (or are companions) and build an entire layout from that standpoint.

13. High Yield Veggie Garden

This resource doesn’t give you an actual layout to work from. It does, however, give you tips on how to properly plan your garden layout.

With that in mind, I felt it was still worth including in this post because many people want to create their own layout, but need some pointers are where to start.

If that is you, then you’ll want to check out the tips and begin building a layout that works for your location.

14. Hip Chick’s Garden Plan 2013

This layout (the way it is illustrated) looks like the first garden plan I shared. It is different in some ways.

First, many more vegetables are included in this garden design. This is great news if you are someone that wants to grow more variety in your garden.

Then I like that the tomatoes are included in multiple beds, instead of lumped together. It all depends upon your gardening goals and preferences.

15. Sobear Garden Plan

This garden plan is a great one. I love the way they created it visually because it makes it easier to follow.

Also, I’m a fan of the fact that they included both flowers, vegetables, and herbs in a unique garden design.

Finally, I love the incorporated walkway all the way around it to make it easier to get to and care for the plants.

16. King George Homes Garden Design

If you are someone that is new to creating or following a garden design, then you might find this option useful.

To start, it is very easy to follow. The graphics are simple. There is no key to understanding it. Also, it is created in a way that is simple to read.

But it also incorporates a variety of vegetables and fruit. I love the fact that it includes hanging baskets for smaller greens as well.

17. The Great Small Garden Layout

This layout is more difficult to read, in my opinion. You can see the names of the vegetables, but it just isn’t as apparent as some of the other plans shared.

However, the layout itself still should work quite well. You should be able to fit a variety of vegetables into a small gardening space.

Then you can have a beautiful and productive garden this summer.

18. Small Garden Layout

I’m a fan of this type of garden design. I think it is easier to read for those that are looking to duplicate the idea.

Which means, if you need a design that will be easy to follow, then you’ll want to check this one.

Also, I love the fact that they have marigolds going all the way around it. It adds protection to the plants and an additional element of beauty to the garden.

19. The Flower/ Vegetable Layout

This garden design is quite cool. If you like to add flowers to your vegetable garden, then you’ll love this design.

They plant a variety of vegetables in the center of the garden. This is great because then you can have more options throughout the growing season.

Then they add sunflowers on the ends and marigolds on the sides to add protection for the vegetables and a splash of color too.

Well, you now have 19 different vegetable garden layouts that could help you to grow a beautiful garden this year.

But I’m curious, how do you layout your vegetable garden? Have you found that certain designs work better than others? If so, which ones?

We’d love to hear from you. Please leave us your thoughts and comments in the space provided below.

The post 19 Vegetable Garden Plans & Layout Ideas That Will Inspire You appeared first on Homesteading Alliance.

The ‘Survival’ Flour That Lasts 30 Years. And You Already Own It.

Image source: Pixabay.com

When most Americans think of flour, they think of all-purpose flour or whole-wheat flour because those are the types most readily available on supermarket shelves.

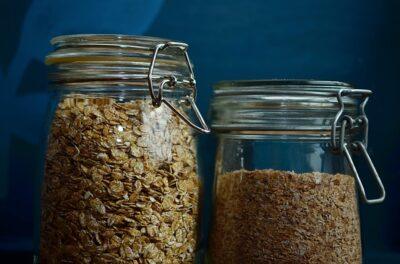
But have you ever tried baking with oat flour? Oat flour is a great alternative to wheat flour – especially for homesteaders, survivalists and preppers.

Why? Oats are inexpensive and have a very long shelf life. When packaged in unopened #10 cans or sealed in Mylar bags and placed in a five-gallon food-grade bucket, oats can last 30 years or more.

Unlike wheat flour, oat flour is gluten-free, so you may find it in your store’s healthy foods section, as well. (You also can make it at home – keep reading.)

That lack of gluten in oat flour gives baked goods a different texture than those made with wheat flour. However, for people who are cutting back or avoiding gluten for dietary or health reasons, oat flour is a welcome choice. As a general rule, however, oat flour is lighter and less coarse than whole-wheat flour.

Just 30 Grams Of This Survival Superfood Provides More Nutrition Than An Entire Meal!

Image source: Pixabay.com

Image source: Pixabay.com

The flavors of oat and wheat flour are similar, although you may discover that oat flour has a heartier and somewhat sweeter taste than all-purpose wheat flour.

How the texture of oat flour compares with wheat flour really depends on the type of wheat flour you have been using. Whole-wheat flour has a thicker, grainier texture than all-purpose wheat flour, for example. Similarly, home-ground oat flour usually has a coarser texture than mill-ground oat flour.

Oat flour is easy to make, and you do not need a special grinder. You can make your own oat flour by putting dried oats into your blender and using the pulse setting to chop the oats into a fine powder. One and one-fourth cups of rolled oats makes about one cup of oat flour.

Grind small one- to two-cup batches at a time. Store unused flour in an airtight container in the refrigerator or freezer.

If you’ve never used oat flour, a good place to start is with quick bread and muffin recipes. Experiment with the ratio, perhaps using one-fourth oat flour and three-fourths wheat flour to start. Then you can slowly increase the ratio of oat flour the next time you bake that item until you are using only oat flour.

Since oat flour does not contain gluten, you may need to adjust your rising ingredients slightly. For example, if your recipe calls for them, you may need to add extra yeast and/or extra baking powder with oat flour than with wheat flour. You also may need to add more or less moisture to get the right consistency.

You can try adding a tablespoon of tapioca starch or potato starch per cup of oat flour used to help lighten the mixture if you like.

Oat flour, which has 120 calories per one-third cup, also works well as a thickener for sauces and gravies.

Oat flour is higher in fiber than wheat flour, and your oat-based baked items will be more nutrient-dense. Oats are a significant source of protein, vitamin E, B vitamins, calcium, iron and other minerals.

Have you ever baked with oat flour? What advice would you add? Share your tips in the section below:

Discover The Secret To Saving Thousands At The Grocery Store. Read More Here.

This article first appeared on offthegridnews.com See it here

The post The ‘Survival’ Flour That Lasts 30 Years. And You Already Own It. appeared first on Homesteading Alliance.

Thursday, February 22, 2018

Foraging For CrabApples (Plus How To Use Them!)

Crabapples or Malus sylesris, can often be found along fields in wooded areas. When cultivated in the home orchard or garden, crabapples grow up on trees that can reach up to 25 feet in height.

The flowers of the crabapples begin as white, light pink to dark pink and purple blossoms. The crabapple fruit will grow in clusters from long stems, and are usually between 1/4 inch to 2 inches in diameter. Actually, if the crabapples are larger than 2 inches, they are considered “apples” and not crabapples.

The leaves of the crabapples may have fine hairs on the underside, but will lose this hair as the leaves mature. Leaves will be 1 1/2-3 inches long and appear to be light green in the Spring, turning dark green in the Summer and have an explosion of color into yellow-orange and reddish-purple hues in the Fall.

When you are ready to go foraging for crabapples, and want to know if they are ripe, simply cut a couple of the fruits at the equator. Ripe crabapples will have a brown seed, and “give” when you squeeze them. Start watching for crabapples to be ready to harvest in August, but there are nearly 1000 crabapple varieties, and some varieties may not be ripe until later in the fall.

Crabapples are a good source of Vitamin C, and are high in pectin. Due to their high pectin content, they are popular for adding to homemade jam to make it “jam” instead of adding store bought pectin. Crabapples also balance out sweet and savory dishes with a light, tart flavor. Try this homemade stuffing for your next holiday meal or family gathering!

Cornbread with Crabapples Stuffing

For the cornbread:

  • 1 ½ cups cornmeal
  • ½ cup fresh ground flour
  • ½ cup sugar
  • 1 teaspoon salt
  • 2 teaspoons baking powder
  • 1½ cups buttermilk
  • 2 eggs
  • 1 stick butter melted

To make the cornbread:

1. in a medium sized bowl, mix all the dry ingredients together.

2. In a separate bowl, whisk together wet ingredients.

3. Combine the wet into the dry, and stir until just mixed.

4. Bake at 350 for 45 minutes. Allow to cool completely.

To make Cornbread With Crabapples Stuffing:

Put it all together:

1. Crumble cornbread into mixing bowl.

2. Preheat oven to 350, and grease a 9×13 pan.

3. In a heavy skillet, melt butter.

4. Add celery, onion and crab apples and sauté for 3 minutes, until soft.

5. Add to crumbled cornbread.

6. Pour stock over mixture.

7. Season with salt and pepper.

8. Stir to combine.

9. Pour mixture into pan, and bake for 45 minutes.

10. Serve hot.

Will you try foraging for crabapples this year? What will you use them for? Be sure to pin this for later!

the post first appeared on thehomesteadinghippy.com See it here

The post Foraging For CrabApples (Plus How To Use Them!) appeared first on Homesteading Alliance.

Getting Started With Backyard Chickens (Interview With Lisa Steele)

Backyard chickens are no longer the sole domain of seasoned farmers homesteaders. Nowadays, even city folks are buying chickens to eat healthier eggs.

But if you’ve never owned chickens, where should you start? That’s the subject of today’s edition of Off The Grid Radio. Our guest is Lisa Steele, a TV host and poultry expert who has written three books about backyard chickens. She also is the founder of Fresh Eggs Daily.

Lisa gives us advice for novices and then shares her best tips for veterans, too.

She also tells us:

  • How to feed chickens naturally – without breaking the bank.
  • Why she doesn’t trick chickens to lay more eggs during winter.
  • How to use herbs to keep chickens healthy.
  • Why she doesn’t refrigerate her eggs.
  • How many chickens one family should own.

We learned a lot from Lisa. You will, too.

This article first appeared on offthegridnews.com See it here

The post Getting Started With Backyard Chickens (Interview With Lisa Steele) appeared first on Homesteading Alliance.

Homemade Spoon Butter Recipe

Wednesday, February 21, 2018

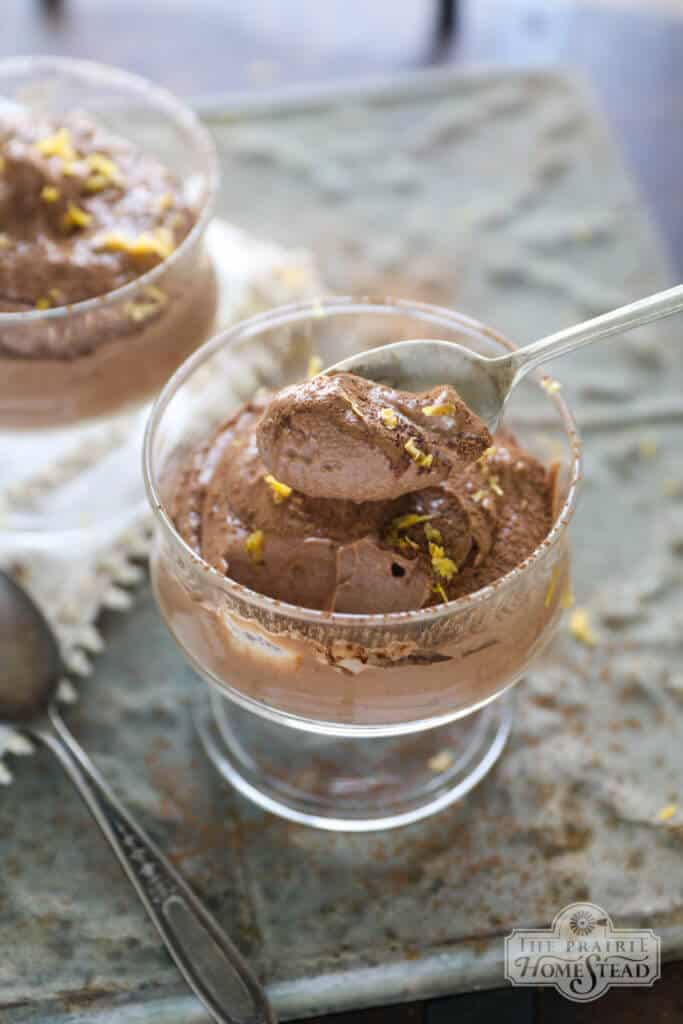
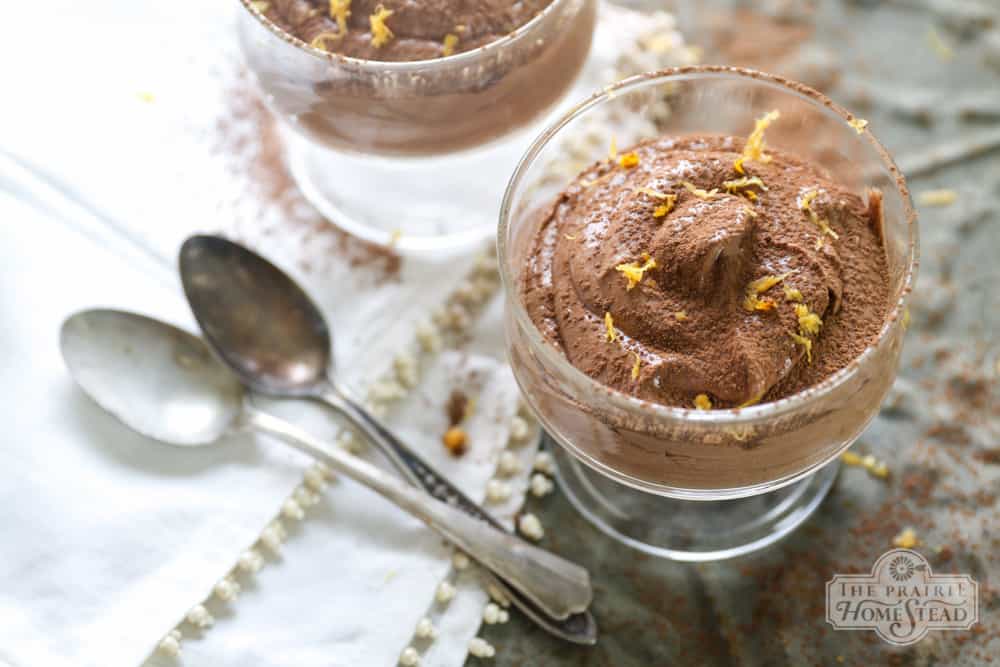
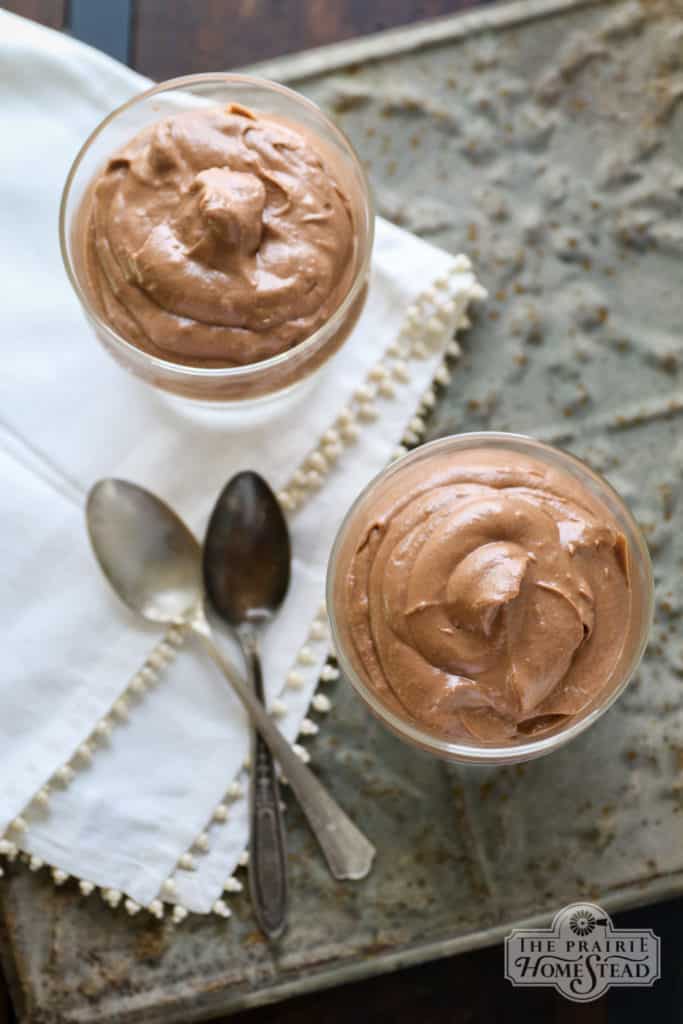
Easy Orange Chocolate Mousse Recipe

Our Valentines Days’ usually look a little different than most folks…

Town is 35+ miles away, and finding a babysitter that day is all but impossible. Not to mention, I just don’t get excited about heading to a crowded restaurant on a specific day because that’s what we’re “supposed to do”. (I get really rebellious when it comes to holiday expectations sometimes… anyone relate?) And so, we usually stay home and eat homegrown steaks, homemade fettuccine Alfredo, and some sort of decadent chocolate dessert.

I’m all about alone time as a married couple, but we prefer to do it in more unorthodox ways I guess, like bumping along in the feed truck going to check our heifers while we brainstorm our next big idea. We’re weird like that.

easy chocolate mousse recipe

So for this moment in time (three small children, no sitter, and a loooong ways from a fancy restaurant), our Valentine’s Day suppers shall include sippy cups instead of candlesticks, and it’s all good.

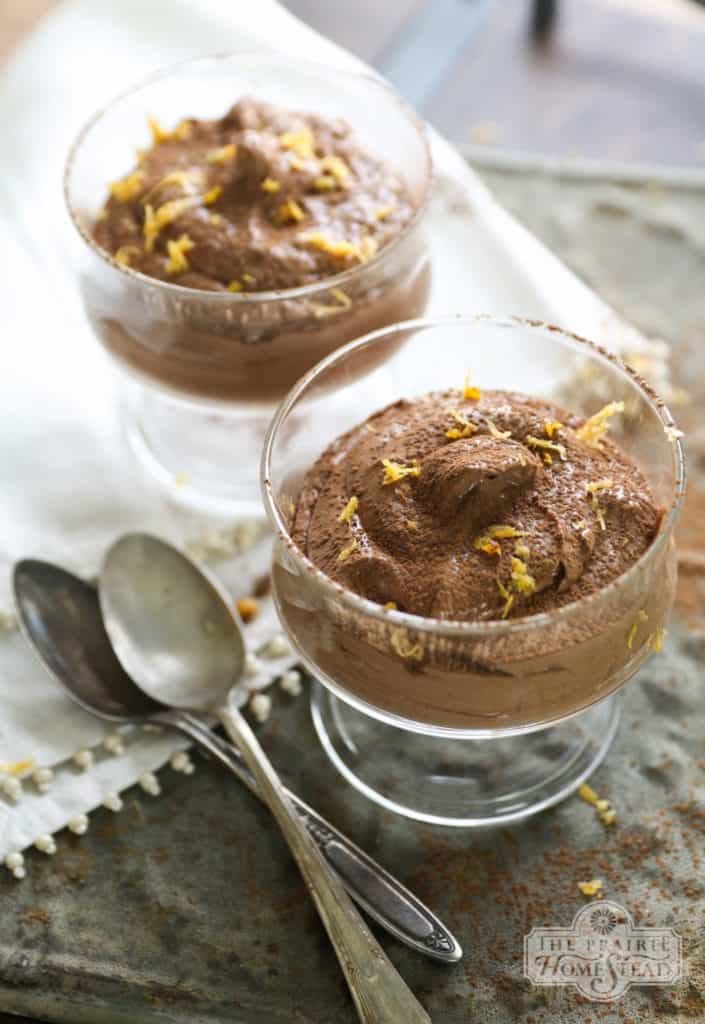
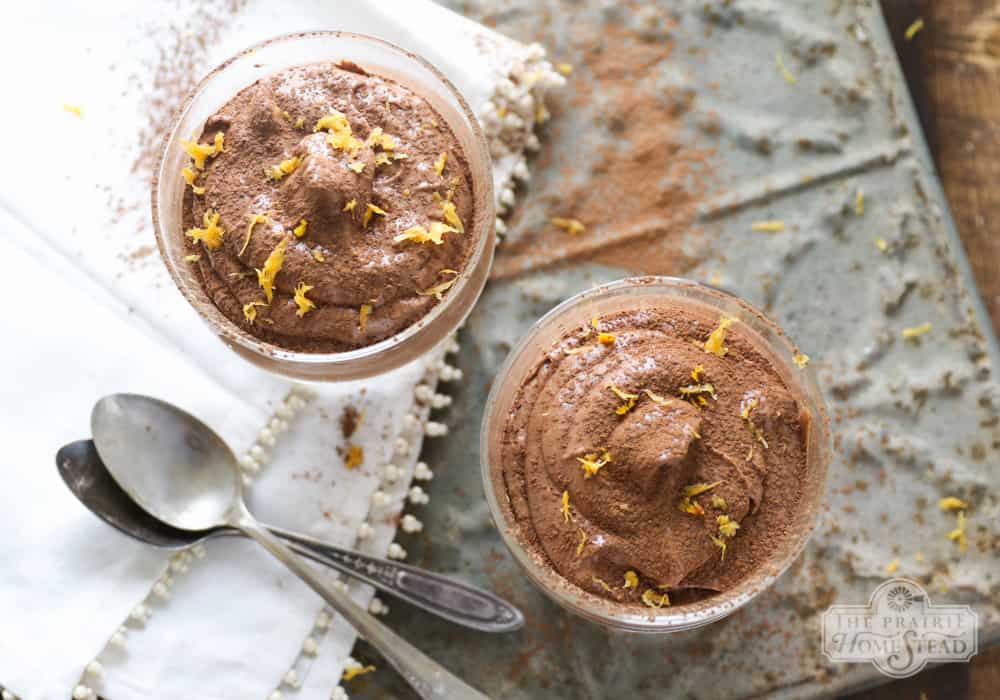
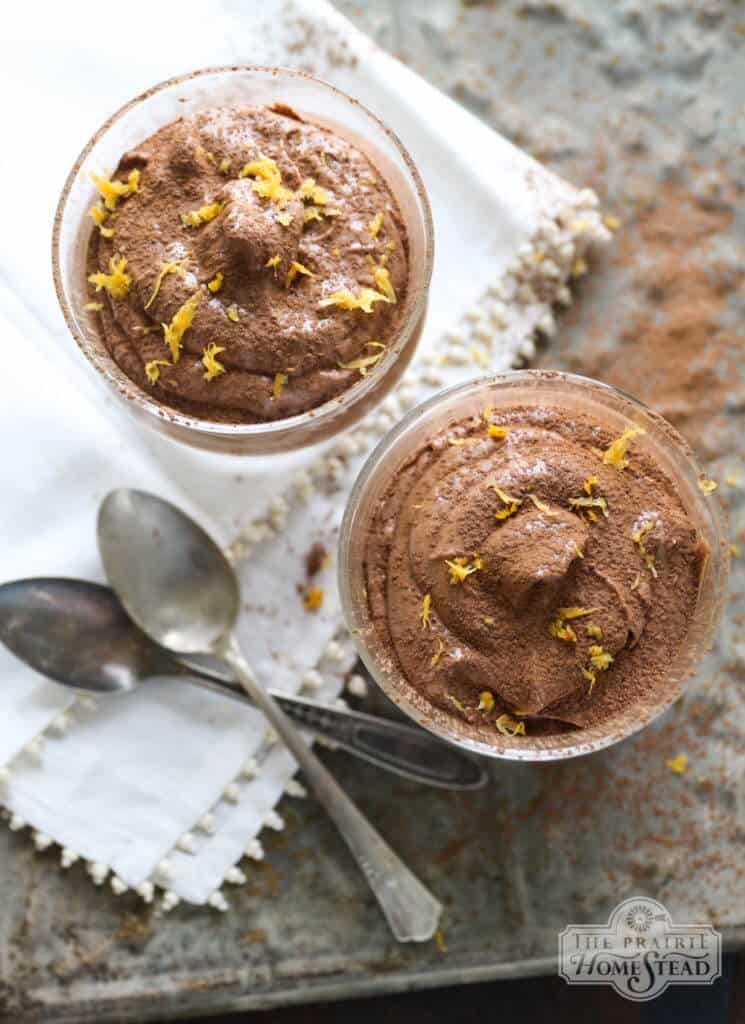
In years past, our dessert of choice has been the Double Chocolate Cream Pie, but recently I’ve added this easy orange chocolate mousse recipe to our repertoire and it’s been a hit. I mean, hello… anything combining whipping cream and chocolate cannot possibly be bad, no matter how hard it tries. A splash of orange juice and sprinkling of orange zest gives it an extra dose of elegance. And the best part? It requires zero cartons of Cool Whip or pudding mixes– hallelujah.

It tastes all sorts of fancy, but couldn’t be easier, or more foolproof, to throw together. Make it for date nights or just because.

easy chocolate mousse recipe

Orange Chocolate Mousse Recipe

You Will Need:

  • 2 cups heavy cream
  • 4 yolks
  • 4 tablespoons maple syrup
  • 3 tablespoons orange juice
  • 1 teaspoon orange zest
  • 6 oz semi-sweet chocolate chips, melted and slightly cooled
  • 1 teaspoon vanilla extract (how to make your own vanilla extract)

Instructions:

Whisk the yolks, syrup, orange juice, and zest together in a small bowl.

Heat 3/4 cup cream in a saucepan over medium-low heat until it’s steamy, but not boiling.

Slowly whisk the hot cream into the egg yolk mixture, then return it all back to the saucepan and cook over low heat until it’s thick enough to coat the back of a spoon.

Mix in the melted chocolate and vanilla extract. (Hopefully the egg yolks stay unscrambled, but just in case they didn’t, you can pour the mixture through a strainer.) Chill.

Once the chocolate custard has cooled completely, whip the remaining 1 1/4 cups of cream with a mixer until stiff peaks form.

Fold the custard into the cream until it’s completely blended and no longer streaky.

Spoon into dessert cups or ramekins and chill for an additional 30 minutes. If desired, you can garnish with additional orange zest, sifted cocoa powder, chocolate chunks, or whipped cream.

Kitchen Notes:

  • Leave your chocolate mousse in the fridge overnight if you’d like to make it a day early.
  • For a rich, creamy pie, simply spoon the mixture into a baked pie crust or graham cracker crust and chill.

easy orange chocolate mousse recipeeasy-orange-chocolate-mousse-recipe

5.0 from 4 reviews Print Easy Orange Chocolate Mousse Recipe Author: The Prairie Homestead Recipe type: Dessert Serves: 8 servings Ingredients

  • 2 cups heavy cream
  • 4 yolks
  • 4 tablespoons maple syrup
  • 3 tablespoons orange juice
  • 1 teaspoon orange zest
  • 6 oz semi-sweet chocolate chips, melted and slightly cooled
  • 1 teaspoon vanilla extract

Instructions

  1. Whisk the yolks, syrup, orange juice, and zest together in a small bowl.
  2. Heat ¾ cup cream in a saucepan over medium-low heat until it's steamy, but not boiling.
  3. Slowly whisk the hot cream into the egg yolk mixture, then return it all back to the saucepan and cook over low heat until it's thick enough to coat the back of a spoon.
  4. Mix in the melted chocolate and vanilla extract. Hopefully you didn't scramble the egg yolks, but just in case you did, you can pour the mixture through a strainer.) Chill.
  5. Once the chocolate custard has cooled completely, whip the remaining 1¼ cups of cream with a mixer until stiff peaks form.
  6. Fold the custard into the cream until it's completely blended and no longer streaky.
  7. Chill for an additional 30 minutes, or you leave it in the fridge overnight if you want to make it a day early.

3.4.3177
easy orange chocolate mousse recipeeasy orange chocolate mousse recipe

The post Easy Orange Chocolate Mousse Recipe appeared first on The Prairie Homestead.

This Article Was Originally Posted at theprairiehomestead.com Read The Original Article Here

The post Easy Orange Chocolate Mousse Recipe appeared first on Homesteading Alliance.

6 Ways To Maximize Your Raised Bed Garden This Year

Image source: Pixabay.com

Sitting inside, pouring over gardening magazines, and dreaming about my spring garden, I envision acres of land covered in lush, green plants. Each row is teeming with fruits or vegetables, and my family is awed by the bounty of supplies that our garden provides.

When I step outside and face the reality of my yard, however, reality comes crashing back. I don’t have acres of land to work with, and my expanse of lawn is stopped abruptly by the fence that divides my yard from my neighbors (all three of them). To make matters worse, the “dirt” in my yard is more accurately called sand and doesn’t seem to want to grow more than weeds. How can I still achieve the garden of my dreams? With raised beds.

Using raised beds, I can still have rows of plants; they’re just contained in smaller areas.

Seamazing: The Low-Cost Way To Re-mineralize Your Soil

Here are six ways to maximize your raised bed garden this year:

1. Shapes matter

To maximize the space, think rectangle instead of square. Using long, rectangular boxes allows you to easily reach all the plants without having to leave pathways for walking. The benefit? You can fit more plants in your box. Use raised beds that are no more than three feet wide for maximum gardening ease.

2. Location, location, location

If you live in an area where good soil is hard to come by, raised beds allow you to grow plants anywhere. By mixing your own soil, you can grow a bountiful garden in your yard, on concrete patios or elsewhere. Place your raised bed in an area that receives full sun, has easy access to water and is safe from outside forces such as pets, running children or lawn mowers.

3. Spacing

Instead of long rows of plants with spaces in between, stagger your planting rows. A traditional garden uses planting squares to help guide your planning. In your raised bed garden, think triangles. Stagger the rows so that the plants in the second row are in between the plants in the first and third rows, forming triangles. This creates a fuller garden, giving you more production capacity.

4. Companion planting

6 Ways To Maximize Your Raised Bed Garden This Year

Image source: Pixabay.com

As you’re developing your garden plan, follow the lead of Native Americans and use “sister” crops. Planting corn, beans and squash together allows the cornstalks to support the beans, while the squash grow happily in the shade provided. Find other compatible plants to group together to provide an assortment of produce. Some other “sisters” are: tomato, basil and onion; carrots, onions and radishes; celery and beets.

5. Succession planting

Want the benefits of your garden to last all season? Plant in cycles. You can capitalize on fast-producers like lettuce by planting a new crop after your harvest. Replace the lettuce with peppers to keep your garden producing longer.

Need Non-GMO Seeds? Get The Best Deals Here!

For even more production, stagger plant dates by using transplants. Grow seedlings by starting them indoors at varying dates. Add plants to your raised bed at two or three week intervals to ensure a continuous supply of produce.

6. Think vertical

Even if you don’t have a large area of ground, your garden can still produce an abundance of food. Just grow up instead of out. Train cucumber and squash to grow up on stakes or trellises. Plant vining crops along one side of your raised bed with sturdy poles, or in the middle using trellises to provide shade or support to other plants.

Are you planning your spring garden? Maybe you’ve decided to try a raised garden bed this year, or you’ve done raised bed gardening in the past, but haven’t been happy with the results. Using these simple tips can help you maximize your raised bed, giving you and your family a rich harvest that can last year-round.

What advice would you add on raised bed gardening? Share your tips in the section below:

Are You Making These Common, Avoidable Gardening Mistakes? Read More Here.

This article first appeared on offthegridnews.com See it here

The post 6 Ways To Maximize Your Raised Bed Garden This Year appeared first on Homesteading Alliance.

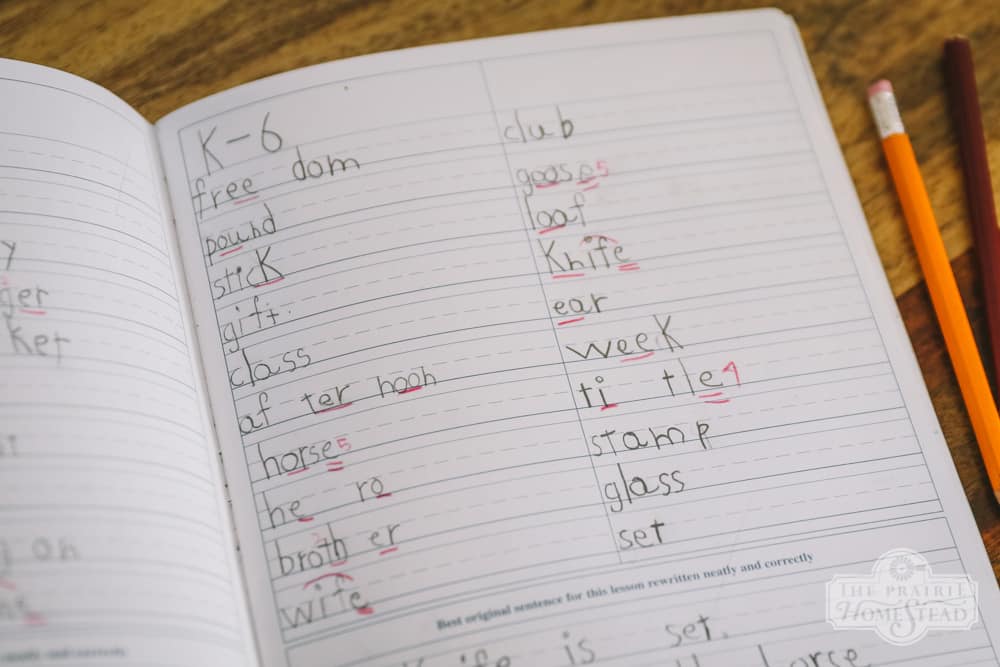
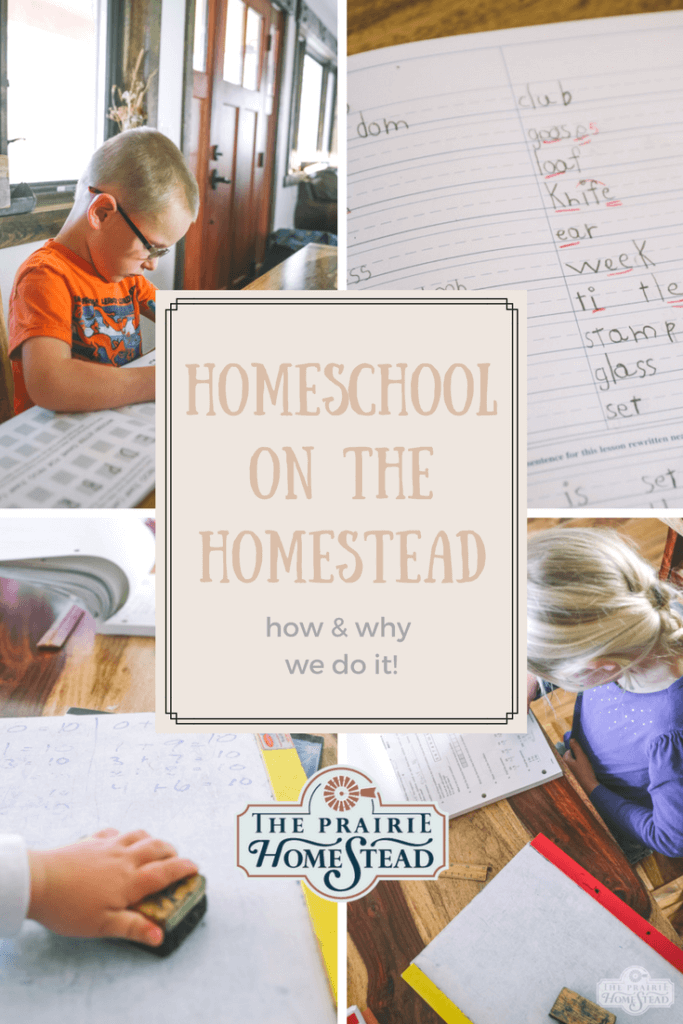
Homestead Homeschooling: Year 3

“Eh… So… Are you still homeschooling?”

I hear that question a lot. And I get it.

I mean, doing school every single morning. With three kids (one being a wild toddler). While running a blog and our doTERRA business. And writing a real, published cookbook. And keeping up with a homestead, etc, etc, etc.

It sounds crazy. Well, it IS crazy. Maybe I’m crazy.

But regardless, the answer is ‘yes’. We are in the thick of our third year of homeschooling and we don’t plan to stop any time soon. I think we’re lifers, y’all.

I’ve written homeschooling posts for our previous two years, (here’s year one and here’s year two) so I figured I’d keep the tradition alive this year and write up what we’re doing this time around.

homeschooling on the homestead, second grade

Why We Homeschool

Our reasons for diving into Year 3 are the same as they were our very first year. In a nutshell: We’ve created a unique life that we love and I don’t want my kids to miss out on it for 7+ hours a day. Homestead life is rich with lessons, creative pursuits, and opportunities to develop skills, and I personally hate the thought of sending my kids away from this environment for the majority of their childhood. It’s important to us to raise our children to be problem-solvers and entrepreneurs, not just employees– I think homeschooling fosters that idea beautifully.

(This is where I interject my disclaimer: homeschooling is not for everyone. Truly. The intention of this post is not to judge or condemn anyone who chooses public schooling. Heck, who knows? Our kids could end up there sometime in the future. As much as I love it, homeschooling is not my sacred cow.)

That being said, homeschooling isn’t perfect and we certainly aren’t perfect. Having been homeschooled myself (K-12), I’ve witnessed very successful homeschool families and extremely dysfunctional ones. But that happens with public schooling, too. There are days where our mornings are ridiculously organized and orderly, and days (kind of like today) where everyone has a hard time staying focused and the toddler is sticking blocks up her nose while we’re doing spelling words. It comes with the territory.

homeschooling on the homestead, second grade

Homeschooling with Three Kids

Speaking of toddlers, doing school with a two-year old in the house is… interesting. I haven’t yet developed a foolproof strategy of getting school done with other little ones in the house. I doubt I’ll ever get it completely figured out– we just do the best we can. Toddlers have a knack for creating chaos, no matter how good your intentions. Our “plan” is usually for her to play with special toys while we do our lessons, but that doesn’t always work and sometimes she ends up sitting on my lap grabbing at Unifix cubes and flashcards with her octopus arms.

homestead homeschool

(By the way– these magnetic tiles are the most-played with toy we own. They are out on a daily basis.)

On the flip side, she’s learning by osmosis (she’s starting to count) and she can hold her pencil with proper form while she pretends to write the letter “a”. So there’s that, I suppose.

This is also my first year schooling two kiddos at once (Kindergarten and Second Grade), which has required some juggling. Prairie Boy turned 5 in October, and if he had been going to public school, he likely would have waited to start Kindergarten until next year. That was initially my plan, since he showed very little interested in schoolwork and had a hard time sitting at the table when we started in September. However, something clicked this winter and he’s been soaking up the lessons like crazy. Right now he’s on track with Kindergarten-level work and really enjoys it, so I’m rolling with it. I can’t believe how much he’s changed in just a few short months.

Homeschool Curriculum: Year Three

The amount of curriculum choices out there will make your head spin, but I am committed to sticking with my plan of keeping things simple. I do not try to recreate a traditional classroom, and we focus on the basics. I especially love curriculum that can be used for multiple grades at once, as I believe there is much value in the one room classroom model.

homeschooling on the homestead, second grade

Here’s what we’ve been using this year:

(this post contains affiliate links)

Reading/Writing/Spelling:

Ever since she started Kindergarten, Prairie Girl has been especially strong in math, but slightly weaker in language arts. We had tried two different reading curriculums previously, and I just didn’t love them. She was getting frustrated and reading wasn’t flowing for her. I spent hours searching for different options, even though I knew in the back of my mind what we’d end up using… My mom used a book called The Writing Road to Reading with me, and I hated every minute of it in elementary school (sorry, just keepin’ it real). However, it gave me an extremely strong foundation in writing and reading, and I still use the principles I learned in that book to this day. (The only higher education I have are two Associates Degrees in Equine Studies– that darn book gave me the tools I needed to turn writing into a career. Who would have thought?)

And so, much to my chagrin, I found myself hunting down that very same book to use with Prairie Girl. It’s been revamped over the years and is now called Spell to Write and Read, but the principles and method are basically the same.

But it hasn’t necessarily been a slam dunk. Let me start with the GOOD first:

In less than six months of implementing Spell to Write and Read, Prairie Girl’s reading has improved dramatically. She’s reading fluidly and confidently, and more importantly, she is understanding WHY words are spelled and pronounced certain ways. I felt like the other books were based too much on all the exceptions to the rules… (“A” says “ah”, but wait… not here, or here, or here, or here…) SWR teaches all of the letter sounds right off the bat, along with spelling rules, so the English language suddenly becomes so much more logical. There are still exceptions, of course, but they are fewer and far between. It’s enlightening, even as an adult. We introduce 30-40 new spelling words each week through the book’s lessons. Focusing on spelling as a foundation has skyrocketed her reading ability and comprehension, and when it’s time to read a storybook, we don’t have the tears and frustration we used to.

SWR functions as a spelling, writing, and reading curriculum (supplemental story/chapter books are recommended once the child is ready), and this all-in-one approach fits perfectly with my “keep it simple” plan.

homeschooling on the homestead, second grade

However, there is another side to SWR:

It is a BEAR to implement. While the curriculum itself is brilliant and I believe wholeheartedly in its premise, the organization of the books are less than impressive. They recommend setting aside a large chunk of time to learn how to teach it, and they aren’t kidding. My first clue should have been the multiple “getting started” guides that came with it– no other curriculum I’ve ever seen or used needs this many different instructional sheets, websites, and videos. It’s insane. I may or may not have said some bad words while sitting at the table late at night trying to decipher it all.

Once you’re familiar with it? It’s a cakewalk. But the way the books are laid out feels clunky and confusing to me.

That being said, the time I spent figuring it all out (about 6-8 hours, I think) was worth it, and I’d do it again for the benefits I’m seeing with my kids. Prairie Boy has already worked through all the letter sounds of the alphabet and I’m excited to use SWR with him from the very beginning. I suspect reading will flow more easily for him not having used other books first.

We also read aloud almost daily. Little House in the Big Woods, Farmer Boy, and Mr. Popper’s Penguins have been our favorites so far this year.

homeschooling on the homestead, second grade

Math:

We used Singapore Math for first grade last year, and while it gave Prairie Girl a strong foundation, I didn’t love how they presented some of the concepts. We switched over to Saxon 2 this year and we’ll be sticking with it for next year as well. I like Saxon’s no nonsense approach and the simplicity of how they present each concept. She’s been breezing right through it, and I’m seeing huge advances in her understanding of various concepts since we started the year.

Math with Prairie Boy started out informally. We did a lot of counting at the beginning of the year, as well as making patterns with blocks and shapes. We’re working on counting by 10s and 5s, and he is grasping basic addition and subtraction concepts. We did most of this with simple manipulatives and a white board, I grabbed a DK Children’s math workbook for him a few weeks ago for added reinforcement, but it’s nothing we haven’t already covered.

homeschooling on the homestead, second grade

History:

We’re using Story of the World again this year and I love it. It’s no frills, but the kids adore it and I love that my 5-year old can tell me about the Hanging Gardens of Babylon and the library of Ashurbanipal. I highly recommend getting the accompanying activity guide for each book, although we don’t always do the more complicated crafts (crafts just ain’t my thing). The Prairie Kids love the coloring pages, and I have noticed a huge different in their retention when they color a page on the story topic.

Science:

I enjoyed Dr. Jay Wile’s biology and chemistry books when I was in high school, so I decided to try his elementary science curriculum this year, Science in the Beginning. It’s marketed as a book for K-6, though I’ve found most of the lessons are a little too advanced for a Kindergartener and a Second Grader. It has an experiment for every lesson, which I appreciated, though some are better than others. We’re using portions of it this year, and I plan to implement more as they grow older. At their ages, most of their science lessons are a part of our every day life, so at this point, they are learning more science during the non-school portion of our days. (Weather, solid/liquid/gas, water cycle, seeds and plants, etc)

homeschooling on the homestead, second grade

Moving Forward

And that’s pretty much the extent of it. We start school by 8am every day (I’m a stickler for staying on a schedule– our life functions best that way), and we usually finish no later than 11am. Afternoons are for playing outside, riding horses, art projects, puzzles, legos, or helping Daddy in the shop. I see us adding more into our days as the kids get older, but right now I’m mainly focused on giving them a very strong foundation in math and reading and going from there. Next year we hope to join our local Classical Conversations community (as a way to connect with other homeschoolers) and Prairie Girl will be doing 4-H once she turns 8.

It’s messy, crazy at times, and not for everyone, but I can genuinely say I’m enjoying this homeschooling ride. Do you homeschool? Leave a comment and share your favorite curriculums!

How and why we homeschool on the homestead!

SaveSave

The post Homestead Homeschooling: Year 3 appeared first on The Prairie Homestead.

This Article Was Originally Posted at theprairiehomestead.com Read The Original Article Here

The post Homestead Homeschooling: Year 3 appeared first on Homesteading Alliance.

5 Minute Homemade Mayonnaise Recipe

Why go to the trouble of making stuff?

Good question. I’ve ask myself that on occasion, especially when I find myself spending precious time deciphering a recipe for something I could grab at the store in two seconds flat.

Sometimes it’s to avoid toxins or artificial ingredients (like in my homemade fly spray or from-scratch BBQ sauce).

Sometimes it’s because I end up with a superior product than the store-bought version (like in the case of my homemade honey lip balm recipe).

But a lot of the time, I DIY just for the sure joy of it. Creating is one of my favorite things, whether the creation involves homemade butter, or homesteading ebooks, or this blog.

The process of creation energizes me better than a cup of black coffee. There’s something about sitting back to admire a completed projected and being able to say, “Hey– I made that!” I’m a creation addict. And there’s no turning back.

Anyone relate?

The Industrial Age brought us many advances, and I’m thankful for well-stocked stores full of ready-made products when I need them. However, only ever being a consumer robs of us of the pleasure that accompanies producing. And creating. And experimenting. And crafting. And while I don’t feel the need to make/grow/product/create every single tiny thing in my life, any time I can add a new skill to my repertoire, it makes me oh so happy.

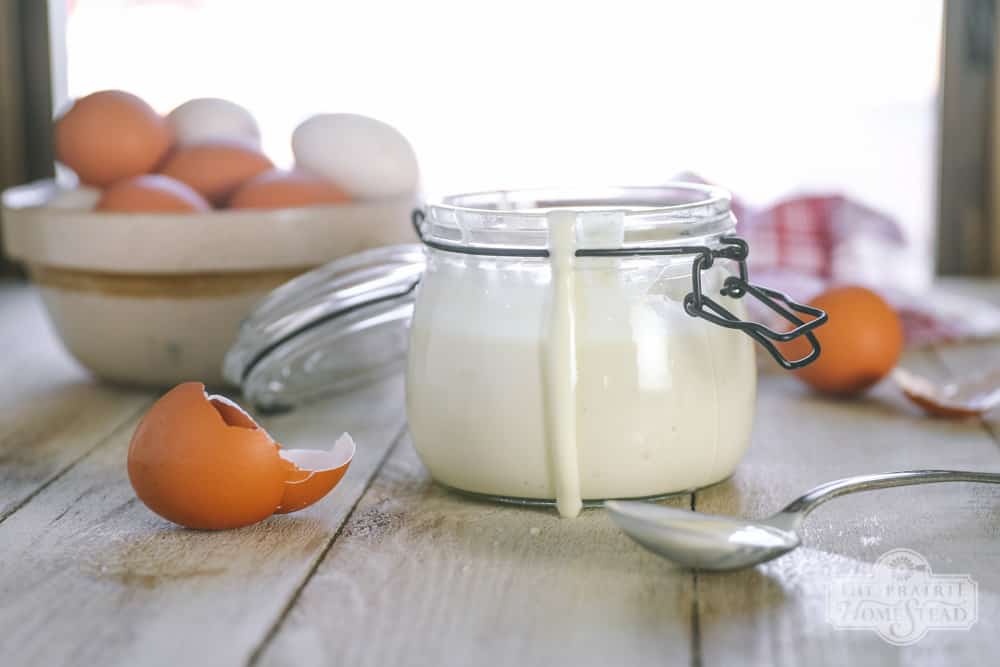
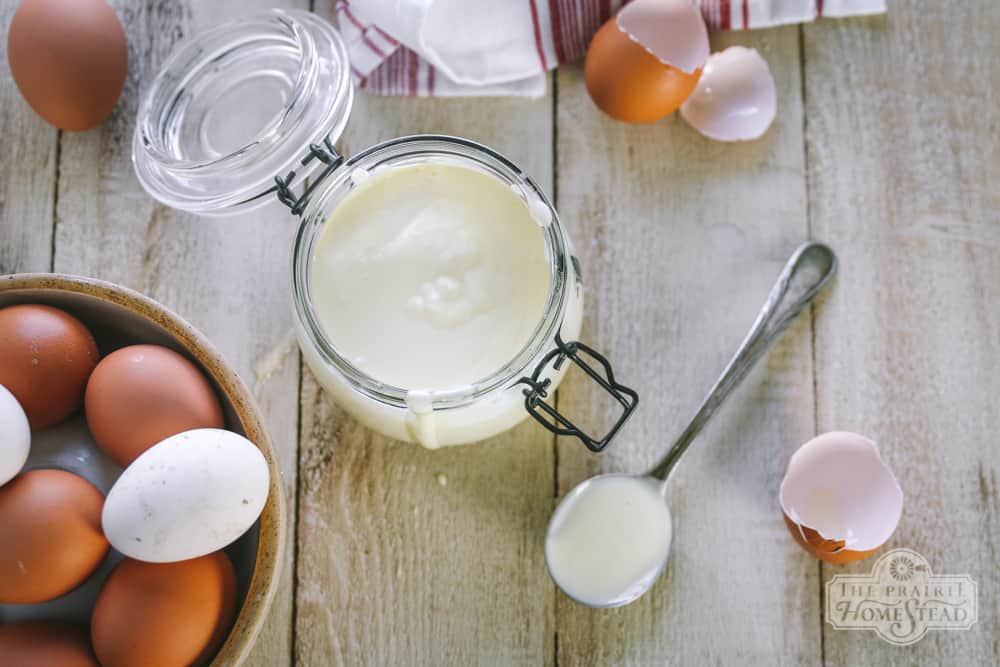
Which brings us to homemade mayo. Creamy, rich, decadent homemade mayo.

homemade mayonnaise recipe

Do You Mayo?

In the interest of full transparency, I don’t make homemade mayonnaise all the time. Just keepin’ it real. It’s not something we eat a ton, and so it’s usually easier for me to simply buy it and keep it in the fridge the rare occasions.

But, how cool is it to say you know how to make mayo from scratch? Because you never know when the insatiable urge for mayo will arise when you don’t have any in the fridge. Plus, you can skip out on the less-than-desirable soybean or canola oils present in many of the premade versions.

There are lots of ways to make mayo, but I’ve found my food processor to be the the simplest method. And holy cow, I just discovered the COOLEST thing you guys.

Go get your food processor right now. No really, go get it. I’ll wait.

homemade mayonnaise recipe

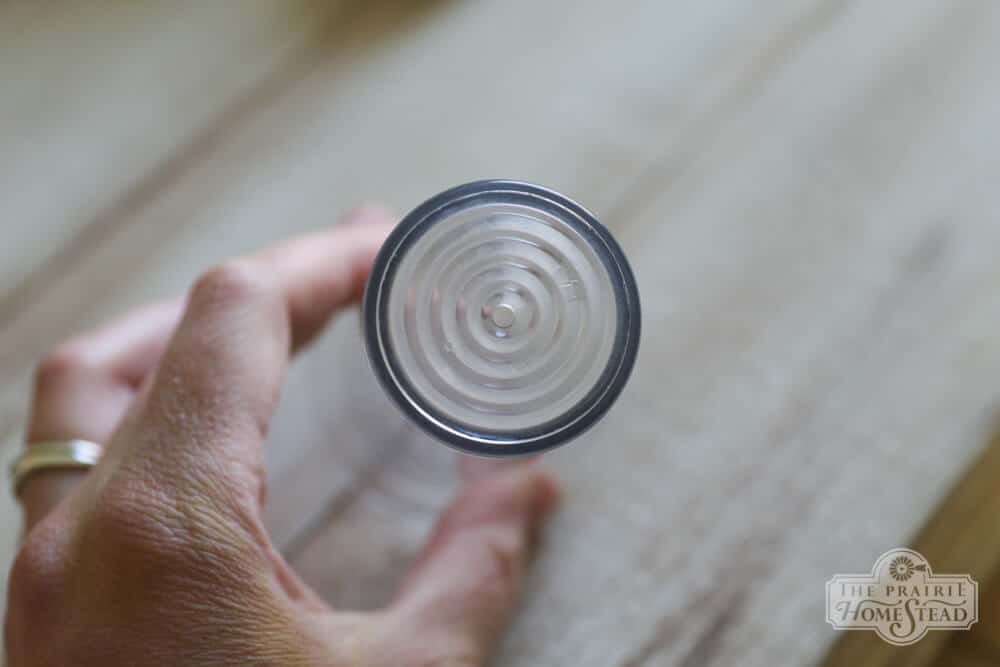
Grab the plunger thingie and look at the bottom. Is there a tiny hole? If so, you have a crazy-awesome mayo-making machine at your disposal and you didn’t even know it.

The teeny hole lets the oil drizzle ever-so-slowly into the rest of the mayonnaise mixture so it emulsifies perfectly. It’s borderline miraculous. Technology, y’all. Who woulda thought?

Brought to You By…

(this post contains affiliate links)

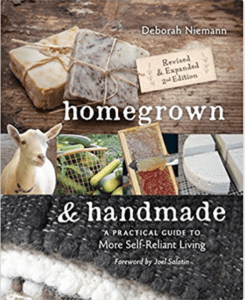
homegrown and handmade bookThis particular homemade mayo recipe is from the book Homegrown & Handmade: A Practical Guide to More Self-Reliant Living by Deborah Niemann.

Deborah does a fantastic job of introducing the reader to the idea of doing what you can to produce more, and this book is a slam-dunk reference for anyone looking to expand their self-reliance, or even just understand the options that are available in the homesteading lifestyle.

Homegrown & Handmade includes chapters on:

  • Growing a sustainable garden
  • Cooking from the sustainable garden
  • Managing a backyard orchard
  • Keeping a backyard poultry flock
  • Starting a home dairy
  • Keeping fiber animals
  • And much more

Now, onto the mayonnaise!

homemade mayonnaise recipe

5 Minute Homemade Mayonnaise Recipe

(From Homegrown & Handmade, used with permission)

You Will Need:

  • 2 eggs
  • 2 tablespoons organic lemon juice (buy it here)
  • 1 teaspoon dry mustard
  • 1/2 teaspoon fine sea salt (buy it here)
  • 1 1/4 cups mild cooking oil (see below for options)

Instructions:

Place the eggs in a food processor or blender and blend for 30 seconds. Add the lemon juice, salt, and dry mustard and blend for an additional 15 seconds.

Slowly drizzle in the oil while the processor or blender runs on high (the slower you drizzle, the thicker the mayo). If the plunger of your food processor lid has the magical hole, simply fill it and let the oil drain out before re-filling with the remainder of the oil.

Blend until the mayo is creamy and thick. Taste and add more lemon juice and/or salt, if needed.

Store in the refrigerator for up to one week.

homemade mayonnaise recipe

homemade mayonnaise recipe

Kitchen Notes:

  • The key to the best-tasting homemade mayonnaise is to use a mild tasting oil, such as light olive oil, sunflower oil, avocado oil, or safflower oil. Skip using straight extra-virgin olive oil–it’s too strong and will overpower it in an unpleasant way. You can also mix oils 50/50 (such as half olive oil/half avocado oil). For a super thick mayo, use half light olive oil and half expeller pressed coconut oil (the kind that does not taste like coconuts– buy it here).
  • Spice up homemade mayo with extra herbs and spices, such as 1 tablespoon parsley, 1 teaspoon dill weed, 1 to 3 teaspoons chili powder, or 1 teaspoon paprika, just to name a few.
  • Any food processor will work, but I have a model similar to this one. (My actual model has been discontinued, I think.)
  • Real mayo does contain raw eggs, so be sure to use eggs from a healthy, reputable source.
  • You can also use a hand blender to make mayo, although I have had the best results with a food processor. You can also use a plain ol’ whisk, but I’m a wimp and my arm gets tired.

P.S. Don’t forget to grab your copy of Homegrown & Handmade for more from-scratch living ideas!

homemade mayonnaise recipe

More DIY Foodie Goodness:

The post 5 Minute Homemade Mayonnaise Recipe appeared first on The Prairie Homestead.

This Article Was Originally Posted at theprairiehomestead.com Read The Original Article Here

The post 5 Minute Homemade Mayonnaise Recipe appeared first on Homesteading Alliance.

Tuesday, February 20, 2018

7 Of The Best Composting Toilets: a Review Guide

In this exclusive composting toilet review guide you will discover exactly what they are, how they actually work and what the best toilets on the market in 2018.

Environmental conservation and eco-friendliness are more than just passing fads. If we want to be good stewards of the Earth we need to adopt practices that reduce our impact on the planet to leave it in better shape for our children.

There’s plenty of ways to do just that. Strategies ranging from using energy-efficient light bulbs to recycling to relying on solar panels for electricity are all excellent eco-friendly alternatives. Another way to “go green”, however, is right under your nose: switching to a composting toilet is often a better way to handle human sanitation.

What is a composting toilet?

A composting toilet isn’t much different than a traditional flush toilet when it comes down to looks. You’ve still got a regular-shaped seat and lid, but there’s no flushing mechanism — there’s no tank! Instead, composting toilets have a receptacle under the bowl where the magic happens.

These receptacles either close automatically after you’re done using the composting toilet or can be closed manually with a turn of a knob or the push of a button.

How does a composting toilet work?

Unlike flush toilets, which focus on using water to remove human waste to be routed to a waste disposal system like a sewer or a septic tank, composting toilets use little to no water at all. Instead, waste gets subjected to a natural reaction, one that doesn’t involve the introduction of artificial chemicals.

The only process at work is aerobic: peat moss and sawdust mix with the waste, and air is introduced to power a microbial reaction that breaks down the waste, dehydrating it and, eventually, turning it into compost — fertilizer.

Does it smell bad?

Composting toilets are not just modern chamber pots. They’re not modern outhouses, either, and the smells associated with a composting toilet are not nearly as bad as you might think.

That’s because of two very important factors: number one, the holding tank for waste as it gets turned into compost is usually separated from the toilet bowl itself by either a manual or automatic closure, and two, all but the smallest and most portable composting toilet systems are vented to prevent any unpleasant odors from lingering.

How do you use it?

For the most part, using a composting toilet doesn’t differ from a regular flush toilet, though the biggest difference is that you’re not flushing your waste away. It’s after this that the biggest differences occur, and these differences largely depend on what type of composting toilet you have.

A simple, portable composting toilet, the kind you would typically take with you camping, usually features a hand-crank to manually aerate the waste to speed up the dehydration and composting process, but the upside is that these can be used anywhere and in any conditions.

After a specific period of time, you simply remove the holding tank from the toilet itself and then spread the compost in places where it’s needed, such as in gardens and flower beds.

Bigger, less portable models often usually mean less hands-on maintenance at the expense of an electrical connection. Electric motors drive a macerator for aeration; these bigger units also have a heater installed to keep the waste at a temperature that’s ideal for turning it into compost.

Finally, these often also have blower fans to facilitate venting. This usually makes the compost removed from these types of models higher quality and easier to handle.

The Best Composting Toilets on the Market Today

Ready to take the plunge in switching to a composting toilet? Here are seven of the best composting toilets on the market today.

Nature’s Head Dry Composting Toilet

Nature’s Head Dry Composting Toilet

This compact and robust composting toilet is a favorite, especially when it comes to providing toilet facilities in smaller spaces like RVs or boats. In fact, the Nature’s Head was originally designed by a pair of sailors, and it even comes with a “spider” handle style crank for installation in tighter spaces.

One of the best sealed and vented composting toilet systems, the Nature’s Head hand crank is used for agitating compost and its electric blower fan with a flexible 5′ long hose is used for venting. Other perks, like featuring completely waterless operation and collecting waste liquid in a separate container, makes this model very popular

Separett Villa 9200 Composting Toilet

Separett Villa 9200 Composting Toilet

Featuring similar performance to the Nature’s Head but with a much more streamlined and less bulky look, the Separett Villa 9200 is perfect for part-time vacation homes or getaway cabins. Liquid waste can be routed completely outside – the company recommends using an external drain pit.

The Separett Villa also features an electric venting fan, but there is no hand crank. Instead, this composting toilet comes with biodegradable composting bin liners that make it easy to dispose of waste as its modestly-sized compost receptacle fills. You can then transfer these bags to a nearby compost pile to let nature finish the job.

Sun-Mar Excel Self-Contained Composting Toilet

Sun-Mar Excel Self-Contained Composting Toilet

The grandaddy of composting toilets, the Sun-Mar Excel is one of the oldest models out there. Sadly, this shows in its design: the Excel is a self-contained unit but it features a very large composting bin, necessitating the inclusion of a step stool. Still, we’re including the Sun-Mar Excel here because there are hundreds of satisfied customers who have been using their unit for decades or more.

The Excel is designed that way because Sun-Mar uses a drum system for its hand-driven crank agitator, and while the approach might have been innovative years ago, today it’s not quite as useful. Additional concerns before looking into a Sun-Mar Excel for your own use include some complaints about newly-constructed models not being as robust as older ones, sometimes even leading to claims of leakage.

Sun-Mar Compact Self-Contained Composting Toilet

Sun-Mar Compact Self-Contained Composting Toilet

A better option for smaller spaces is the Sun-Mar Compact, a scaled down version of the Excel that still provides excellent composting ability. Unlike the Excel with its giant composting bin, there’s no need for a step stool to get on top of the Sun-Mar Compact. This makes it a much better choice for anyone looking for a composting toilet with a small footprint like in an RV.

Featuring the same waterless, drum-based composting tech of its bulkier predecessor, the Sun-Mar Compact does have a front-mounted agitator crank. This makes it not-so-great for spaces without enough forward clearance — something to keep in mind when selecting this model composting toilet.

Sanitation Equipment Visa Potty Model 268

Sanitation Equipment Visa Potty Model 268

The Visa’s Model 268 composting toilet isn’t going to win any beauty contests. Its square and boxy aesthetic is utilitarian as it comes. However, it’s this focus on function over form that makes the Model 268 a snap to clean and empty thanks to its well-engineered quick-release latches.

Another feather in the cap of the Model 268 is that it is eminently portable, making it a great choice for travel or for transporting to an off-grid cabin. One important facet to keep aware of, however: the seal between the top and the holding tank is so good that the bottom half can pressurize if you move from the lowlands to the mountains, so make sure to vent it properly in these situations.

Thetford Porta Potti

Thetford Porta Potti

Unlike the Visa 268 the Thetford Porta Potti is actually pleasant to look at. Featuring a curved front and a seat height that brings it roughly into the same dimensions of a traditional toilet, the Thetford gets high marks for comfort and design.

This completely self-contained unit is not a great choice for permanent installations, however. The seal between the toilet seat and the storage tank suffers from the same pressure problems as the Visa 268, and are perhaps even worse, and stability issues necessitate the use of a “hold down kit” that’s separately available from the manufacturer. This makes the Thetford ideal for small-scale use but otherwise not much else.

Camco Standard Portable Travel Toilet

Camco Standard Portable Travel Toilet

Designed specifically for travel use in RVs and boats, the Camco Standard is an excellent choice for anyone road-tripping it in style.

While it does have some serious drawbacks, such as having a very small capacity when compared to models that are more accustomed to permanent installations, the ease-of-use of the Camco Standard puts it in contention for anyone who needs a compact, self-contained travel toilet.

Much like the Visa 268, the Camco Standard isn’t much to look at; it’s boxy and unremarkable. However, Camco does have a “Premium” version of its travel toilet that features an updated, curved front to give it a look much more reminiscent of the Thetford without sacrificing any of its functionality.

You’re not going to be winning any beauty contests either way, but your waste will be kept safe and secure until your travels come to an end.

The post 7 Of The Best Composting Toilets: a Review Guide appeared first on Homesteading Alliance.

How to Build an Earthbag House (and Why You Should)

15 Incredible Things You Can Do With Tea Tree Oil

Image source: Wikipedia

The tea tree, or Melaleuca alternifolia, is native to Australia and produces one of the most popular essential oils, tea tree essential oil.

Captain James Cook and his sailors stumbled upon the tree in the 18th century, and discovered that the leaves of the tree — when brewed as a tea — could combat scurvy. The tree soon after became known as the “tea tree.”

Of course, the indigenous people of Australia, the Aborigines, were already aware of the tree’s healing powers and used the leaves of the tree to battle respiratory problems and to relieve headaches.

Tea tree essential oil has antimicrobial, antibacterial, antiviral, antiseptic, anti-inflammatory and antifungal properties. The aroma of the essential oil is fresh, pungent and medicinal, with sweeter, woody notes as it evaporates.

Let’s take a look at 15 uses for this incredible essential oil.

1. Fight viral infections and airborne germs

Since tea tree essential oil is antiviral and antibacterial, it is good for fighting germs that cause the flu and other sicknesses. There are several ways you can use the oil, including as a massage blend and in an air diffuser to purify the air.

Recipe for an antiviral massage blend:

  • 4 drops tea tree essential oil
  • 2 drops black pepper essential oil
  • 4 drops bergamot essential oil
  • 4 tsp of a carrier oil such as sweet almond oil

To boost your immune system and fight off illnesses, massage the blend onto your skin at least once per day.

2. Heal wounds

Tea tree essential oil is ideal for treating wounds and preventing an infection from setting in.

To treat wounds and insect bites:

  • Place 2 drops of tea tree essential oil on a cotton ball and swipe over the wound or insect bite.

It is OK to use tea tree essential oil, without a carrier oil, for treating wounds. But if you have sensitive skin, add a drop of a carrier oil to the tea tree oil before wiping the wound.

3. Disinfect surfaces in your home and car

Tea tree essential oil is a potent surface cleaner and germ killer. Simply spray and wipe a solution with tea tree essential oil over all surfaces of your home and car. Don’t forget about door knobs, cabinet knobs, light switches, remotes, computer keyboards, mouses, and kitchen and bathroom fixtures. Furthermore, using a cleaning solution with tea tree essential oil for wiping down the interior of your car can prevent the spread of illness-causing germs.

Germ-killing cleaning solution:

  • 15 drops tea tree essential oil
  • 15 drops lemon essential oil
  • 4 oz. white vinegar
  • 8 oz. distilled water
  • Mix in a spray bottle

4. Treat acne

Tea tree essential oil is considered one of the most effective, natural, acne treatments available. In fact, it can be as effective as peroxide for acne-prone skin, and does not have the harsh side-effects such as drying and peeling.

Homemade face blend for acne-prone skin:

  • 4 drops tea tree essential oil
  • 4 drops lemon essential oil
  • 4 drops geranium essential oil
  • 4 tsp jojoba carrier oil

Place several drops of the blend onto a cotton swab and wipe over your face with it in an upward motion. Allow the oils to absorb into your skin.

5. Remedy a dry scalp

Tea tree is beneficial for the health of your skin, and this includes the scalp. It can prevent dry, flaking skin, dandruff, and even can be used to treat lice.

Just 30 Grams Of This Survival Superfood Provides More Nutrition Than An Entire Meal!

Add tea tree directly to your shampoo and conditioner, or try this homemade remedy:

Tea tree scalp treatment:

  • 4 drops tea tree essential oil
  • 4 drops lavender essential oil
  • 2 drops cedarwood essential oil
  • 4 tsp coconut oil

Massage the blend into your hair and scalp and leave it in for about 30 minutes, and then shampoo it out.

6. Fight toenail fungus, ringworm and athlete’s foot

15 Incredible Things You Can Do With Tea Tree Oil

Image source: Pixabay.com

Tea tree essential oil has the ability to kill parasites and fungus. Use it neat, or undiluted, right on the infected areas. If you have sensitive skin, add a carrier oil.

Fungus-killing solution:

  • 5 drops tea tree essential oil
  • 5 drops oil of oregano
  • 4 tsp of a carrier oil

7. Remove warts

Tea tree essential oil can naturally remove unwanted warts. Just apply several drops of tea tree essential oil several times a day to the wart. Be patient, as it can take up to 30 days to completely remove the wart.

8. Kill mold

Mold grows in damp places and can quickly become an infestation. To kill mold, place a diffuser in the area, such as your bathroom or garage, and diffuse tea tree oil into the air. Or, you can use a spray bottle with tea tree essential oil and water. Spray the solution on shower curtains, window sills, dishwashers, laundry machines, and anywhere else you might notice mold growing.

9. Prevent body odor (deodorant)

Because of its antimicrobial properties, tea tree essential oil can naturally control body odor.

Natural deodorant recipe:

  • 15 drops tea tree essential oil
  • 1/3 cup baking soda
  • ½ cup cornstarch
  • 5 tbsp coconut oil
  • Add lavender essential oil for scent if you

Mix together the baking soda and cornstarch in a bowl, and then add liquefied coconut oil, your essential oils and blend. Store the blend in an airtight container and use it daily.

10. Make homemade toothpaste and mouthwash

Because tea tree essential oil is antibacterial, it will kill germs in the mouth. It can prevent tooth decay, bleeding gums and bad breath.

Toothpaste and mouthwash recipe:

  • 15 drops tea tree essential oil
  • ½ cup baking soda
  • 5 tbsp liquified coconut oil
  • Mix together and keep in an airtight container.

You can use the blend as toothpaste or allow it to melt in your mouth as a mouthwash. Be sure to spit it out. Never swallow tea tree essential oil.

11. Treat eczema and psoriasis

Tea tree can treat any kind of skin inflammation and is a natural healing agent, so it’s ideal for relieving the symptoms of eczema and psoriasis.

Eczema and psoriasis remedy:

  • 5 drops tea tree essential oil
  • 5 drops lavender essential oil
  • 1 tsp coconut oil
  • Rub into the affected area as needed.

12. Relieve a sore throat

15 Incredible Things You Can Do With Tea Tree Oil

Image source: Pixabay.com

Because tea tree essential oil can help with the inflammation of the mucous membranes, it can effectively be used to help relieve a sore throat. Add one drop of tea tree essential oil to enough warm water with which to gargle. Make sure to spit out the mixture and not to swallow it.
13. Fight colds (expectorant)

Tea tree essential oil can help clear airways and a stuffed-up nose. It can also help to ease a headache.

Head cold remedy massage rub:

  • 5 drops tea tree essential oil
  • 5 drops eucalyptus essential oil
  • 4 tsp sweet almond oil
  • Rub into the chest area and on the temples.

14. Repell insects

Pests hate the smell of tea tree essential oil, and it is useful for repelling most of them.

Natural bug and pest spray:

  • 20 drops tea tree essential oil
  • 5 drops citronella essential oil
  • 16 oz distilled water

Using a spray bottle, spray the blend around doorways, windows and cracks to keep pests out of your home. You also can spray the combination on your clothes to ward off insects when you go outdoors. To use on your skin, add several drops of a carrier oil to help with the absorption.

15. Sanitize hands

Try this blend to make an all-natural hand sanitizer that is not rough on your hands:

Natural hand sanitizer recipe:

  • 30 drops tea tree essential oil
  • 10 drops lavender essential oil
  • 10 drops clove essential oil
  • 1 tbsp witch hazel
  • 8 oz. aloe vera gel

Mix all the ingredients in a bowl and then store it in an airtight container. Carry a small amount around with you in a travel-sized squeeze bottle.

Harness The Power Of Nature’s Most Remarkable Healer: Vinegar

This article first appeared on offthegridnews.com See it here

The post 15 Incredible Things You Can Do With Tea Tree Oil appeared first on Homesteading Alliance.