Pages

Tuesday, February 20, 2018

15 Incredible Things You Can Do With Tea Tree Oil

Image source: Wikipedia

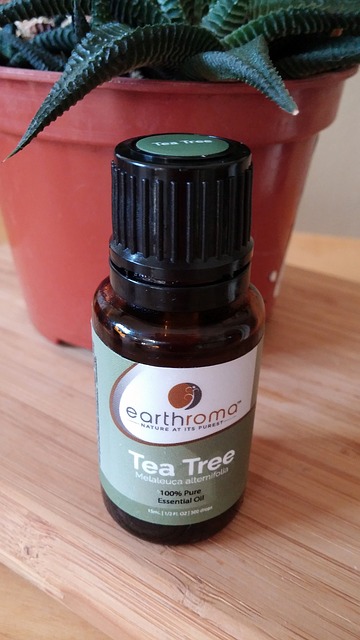
The tea tree, or Melaleuca alternifolia, is native to Australia and produces one of the most popular essential oils, tea tree essential oil.

Captain James Cook and his sailors stumbled upon the tree in the 18th century, and discovered that the leaves of the tree — when brewed as a tea — could combat scurvy. The tree soon after became known as the “tea tree.”

Of course, the indigenous people of Australia, the Aborigines, were already aware of the tree’s healing powers and used the leaves of the tree to battle respiratory problems and to relieve headaches.

Tea tree essential oil has antimicrobial, antibacterial, antiviral, antiseptic, anti-inflammatory and antifungal properties. The aroma of the essential oil is fresh, pungent and medicinal, with sweeter, woody notes as it evaporates.

Let’s take a look at 15 uses for this incredible essential oil.

1. Fight viral infections and airborne germs

Since tea tree essential oil is antiviral and antibacterial, it is good for fighting germs that cause the flu and other sicknesses. There are several ways you can use the oil, including as a massage blend and in an air diffuser to purify the air.

Recipe for an antiviral massage blend:

  • 4 drops tea tree essential oil
  • 2 drops black pepper essential oil
  • 4 drops bergamot essential oil
  • 4 tsp of a carrier oil such as sweet almond oil

To boost your immune system and fight off illnesses, massage the blend onto your skin at least once per day.

2. Heal wounds

Tea tree essential oil is ideal for treating wounds and preventing an infection from setting in.

To treat wounds and insect bites:

  • Place 2 drops of tea tree essential oil on a cotton ball and swipe over the wound or insect bite.

It is OK to use tea tree essential oil, without a carrier oil, for treating wounds. But if you have sensitive skin, add a drop of a carrier oil to the tea tree oil before wiping the wound.

3. Disinfect surfaces in your home and car

Tea tree essential oil is a potent surface cleaner and germ killer. Simply spray and wipe a solution with tea tree essential oil over all surfaces of your home and car. Don’t forget about door knobs, cabinet knobs, light switches, remotes, computer keyboards, mouses, and kitchen and bathroom fixtures. Furthermore, using a cleaning solution with tea tree essential oil for wiping down the interior of your car can prevent the spread of illness-causing germs.

Germ-killing cleaning solution:

  • 15 drops tea tree essential oil
  • 15 drops lemon essential oil
  • 4 oz. white vinegar
  • 8 oz. distilled water
  • Mix in a spray bottle

4. Treat acne

Tea tree essential oil is considered one of the most effective, natural, acne treatments available. In fact, it can be as effective as peroxide for acne-prone skin, and does not have the harsh side-effects such as drying and peeling.

Homemade face blend for acne-prone skin:

  • 4 drops tea tree essential oil
  • 4 drops lemon essential oil
  • 4 drops geranium essential oil
  • 4 tsp jojoba carrier oil

Place several drops of the blend onto a cotton swab and wipe over your face with it in an upward motion. Allow the oils to absorb into your skin.

5. Remedy a dry scalp

Tea tree is beneficial for the health of your skin, and this includes the scalp. It can prevent dry, flaking skin, dandruff, and even can be used to treat lice.

Just 30 Grams Of This Survival Superfood Provides More Nutrition Than An Entire Meal!

Add tea tree directly to your shampoo and conditioner, or try this homemade remedy:

Tea tree scalp treatment:

  • 4 drops tea tree essential oil
  • 4 drops lavender essential oil
  • 2 drops cedarwood essential oil
  • 4 tsp coconut oil

Massage the blend into your hair and scalp and leave it in for about 30 minutes, and then shampoo it out.

6. Fight toenail fungus, ringworm and athlete’s foot

15 Incredible Things You Can Do With Tea Tree Oil

Image source: Pixabay.com

Tea tree essential oil has the ability to kill parasites and fungus. Use it neat, or undiluted, right on the infected areas. If you have sensitive skin, add a carrier oil.

Fungus-killing solution:

  • 5 drops tea tree essential oil
  • 5 drops oil of oregano
  • 4 tsp of a carrier oil

7. Remove warts

Tea tree essential oil can naturally remove unwanted warts. Just apply several drops of tea tree essential oil several times a day to the wart. Be patient, as it can take up to 30 days to completely remove the wart.

8. Kill mold

Mold grows in damp places and can quickly become an infestation. To kill mold, place a diffuser in the area, such as your bathroom or garage, and diffuse tea tree oil into the air. Or, you can use a spray bottle with tea tree essential oil and water. Spray the solution on shower curtains, window sills, dishwashers, laundry machines, and anywhere else you might notice mold growing.

9. Prevent body odor (deodorant)

Because of its antimicrobial properties, tea tree essential oil can naturally control body odor.

Natural deodorant recipe:

  • 15 drops tea tree essential oil
  • 1/3 cup baking soda
  • ½ cup cornstarch
  • 5 tbsp coconut oil
  • Add lavender essential oil for scent if you

Mix together the baking soda and cornstarch in a bowl, and then add liquefied coconut oil, your essential oils and blend. Store the blend in an airtight container and use it daily.

10. Make homemade toothpaste and mouthwash

Because tea tree essential oil is antibacterial, it will kill germs in the mouth. It can prevent tooth decay, bleeding gums and bad breath.

Toothpaste and mouthwash recipe:

  • 15 drops tea tree essential oil
  • ½ cup baking soda
  • 5 tbsp liquified coconut oil
  • Mix together and keep in an airtight container.

You can use the blend as toothpaste or allow it to melt in your mouth as a mouthwash. Be sure to spit it out. Never swallow tea tree essential oil.

11. Treat eczema and psoriasis

Tea tree can treat any kind of skin inflammation and is a natural healing agent, so it’s ideal for relieving the symptoms of eczema and psoriasis.

Eczema and psoriasis remedy:

  • 5 drops tea tree essential oil
  • 5 drops lavender essential oil
  • 1 tsp coconut oil
  • Rub into the affected area as needed.

12. Relieve a sore throat

15 Incredible Things You Can Do With Tea Tree Oil

Image source: Pixabay.com

Because tea tree essential oil can help with the inflammation of the mucous membranes, it can effectively be used to help relieve a sore throat. Add one drop of tea tree essential oil to enough warm water with which to gargle. Make sure to spit out the mixture and not to swallow it.

13. Fight colds (expectorant)

Tea tree essential oil can help clear airways and a stuffed-up nose. It can also help to ease a headache.

Head cold remedy massage rub:

  • 5 drops tea tree essential oil
  • 5 drops eucalyptus essential oil
  • 4 tsp sweet almond oil
  • Rub into the chest area and on the temples.

14. Repell insects

Pests hate the smell of tea tree essential oil, and it is useful for repelling most of them.

Natural bug and pest spray:

  • 20 drops tea tree essential oil
  • 5 drops citronella essential oil
  • 16 oz distilled water

Using a spray bottle, spray the blend around doorways, windows and cracks to keep pests out of your home. You also can spray the combination on your clothes to ward off insects when you go outdoors. To use on your skin, add several drops of a carrier oil to help with the absorption.

15. Sanitize hands

Try this blend to make an all-natural hand sanitizer that is not rough on your hands:

Natural hand sanitizer recipe:

  • 30 drops tea tree essential oil
  • 10 drops lavender essential oil
  • 10 drops clove essential oil
  • 1 tbsp witch hazel
  • 8 oz. aloe vera gel

Mix all the ingredients in a bowl and then store it in an airtight container. Carry a small amount around with you in a travel-sized squeeze bottle.

Harness The Power Of Nature’s Most Remarkable Healer: Vinegar

This article first appeared on offthegridnews.com See it here

The post 15 Incredible Things You Can Do With Tea Tree Oil appeared first on Homesteading Alliance.

10 Ways Avocados Just Might Help You Live Longer

Image source: Pixabay.com

Did you grow up avoiding eating avocados because they were “fatty” and loaded with calories? Many of us did. However, today’s nutritionists recognize the avocado as one of the healthiest fruits around.

Yes, avocado has a high content of fatty acids, but these fats offer many nutritional benefits. The “good” fats in avocado can help keep your cholesterol levels down and can decrease your risk for heart disease. On a sandwich, mashed avocado offers fewer calories and more nutrition than butter or mayo.

Sometimes called alligator pears, avocados are packed with fiber, vitamin K, folate, vitamin B5, vitamin B6, vitamin C, and more than twice the potassium of a banana. The fruit also contains vitamin E, niacin, and riboflavin, and when you eat an avocado along with other foods, it can help your body absorb other important nutrients, such as lutein and alpha- and beta-carotene.

Avocados are believed to have originated in Mexico. Historians report that Spanish explorers found the fruit there in the early 16th century, but drawings discovered in early Aztec settlements reveal that avocados grew wild in Central America and South America thousands of years before then.

Get Free Electricity — And Never Be Without Power!

Eventually, Mexican avocado trees found their way to California along with early settlers, and today California grows nearly 90 percent of the U.S. avocado crop. (And many homesteaders grow them indoors.)

Not only is it the basis for guacamole, but fresh avocado is a great addition to salads, and it can be tasty sliced as a snack or spread on a sandwich or crackers. Now let’s look at the 10 main health benefits of avocados.

1. Potassium. Avocados are high in potassium, which helps reduce high blood pressure, a risk factor for heart attacks, strokes and kidney failure.

2. Vitamins. Eating an avocado is almost like talking a natural daily vitamin supplement. It is especially high in vitamins K, B5 and C.

3. Healthy fats. Avocados are high in healthy monounsaturated fatty acids, such as oleic acid. Oleic acid, which also is in olive oil, helps reduce inflammation in the body and is important to heart health.

4. Fiber. Fiber consumption contributes to weight loss, reduces blood sugar spikes and helps maintain a healthy balance of bacteria in the intestine.

5. Lower cholesterol and triglyceride levels. Avocados are linked with healthy cholesterol and blood markers and fewer heart disease risk factors.

6. Nutrient absorption. Eating avocados along with other food helps your body better utilize nutrients, especially antioxidants absorption.

7. Antioxidants. Lutein and zeaxanthin are two nutrients contained in avocados that are important for eye health.

8. Bone health. Extracts from avocado oil, called avocado unsaponifiables, can help reduce symptoms of osteoarthritis.

9. Appetite reduction. Eating a meal that contains avocados may help you feel fuller longer, helping you to consume fewer calories.

10. Nutritious baby food. When you are ready to feed your six-month-old or older baby solid food, mashed avocado is a fine choice. More nutritious than an apple or a banana, avocado provides protein, folate, vitamin B6 and the 10 essential amino acids.

How to Select and Store Avocados

Avocados have their best flavor when they are perfectly ripe. A ripe avocado feels slightly soft when you apply a little pressure to the skin.

To ripen a hard avocado, place it in a paper bag and then check it each day, or put it next to a banana in your countertop fruit bowl. You can place a ripe avocado in the refrigerator to preserve its freshness. Once you have opened an avocado, a squeeze of lemon juice can help protect it from browning.

Ready to add some more avocados into your life? Try them fresh and raw or here is an easy guacamole recipe to try

Guacamole (yields 2 1/2 cups)

Ingredients

3 medium to large avocados

1 firm tomato, diced

1/2 white onion

1/2 cup chopped cilantro

2 TB fresh lime juice

Salt and pepper to taste

Directions

Open the avocados by cutting them length-wise around the pit and then using a sharp knife to strike the pit so that it sticks there. Now twist the knife so that you can easily the pit and scoop out the flesh.

Mash the flesh with a fork.

Stir in other ingredients.

Sources

https://www.prevention.com/food/food-remedies/avocado-lowers-ldl-cholesterol

https://nutritionfacts.org/video/are-avocados-healthy/

https://www.huffingtonpost.com/david-zinczenko/8-reasons-avocado-is-a-pe_b_6648104.html

http://www.newsweek.com/healthy-heart-diet-potassium-avocado-toast-and-bananas-may-prevent-disease-679593

This article first appeared on offthegridnews.com See it here

The post 10 Ways Avocados Just Might Help You Live Longer appeared first on Homesteading Alliance.

Monday, February 19, 2018

What To Feed Chickens For A Healthy Flock

When raising backyard chickens, your first thought should be a secure home for them. Where will they live, what kind of coop will best fit my needs? After you have a secure home, making sure your flock has plenty of water is a must. Waterers can be simple, or complex, depending on what you want. You can use a simple dog dish for a water container, or purchase a more elaborate one for your flock. Check out this automatic waterers for chickens from my affiliate partner here.

Next on the list is what to feed your flock. To get high quality eggs, your flock will need the proper nourishment. This includes the right feed, or rations, sunshine, water and plenty of bugs and worms they can scratch around for.

To see some ideas on coops, read the post here.

What To Feed Chickens

Learning what to feed chickens in your flock isn’t complicated. Obviously, you can purchase feed from your local farm supply store. Depending on whether you have laying hens, or meat birds, your flock’s feed needs will change.

For egg laying pullets younger than 16 weeks old, you want them to grow slowly enough to develop good, strong bones and to reach a good body weight before they begin to produce eggs. Higher protein diets tend to hurry the birds into production before their bodies are quite ready. Therefore, the ration for growing pullets, from leaving the brooder at 6 weeks to about 14 weeks, should be about 18 percent protein. A medium weight hen at full size can consume approximately 1/4 pound of feed per day.

To see what you SHOULDN’T feed your flock, read the post here.

At 15 weeks, it is ideal to lower the ration to 16 percent protein., also known as “developer or finishing” feed. From 15 weeks to 22 weeks old or until they begin laying eggs, whichever is first, protein levels should be about 16 percent. The object is to get them well grown without too much fat. Also, if they get too much calcium and phosphorus at an early age, it can damage their kidneys. It’s best to not feed layer rations until your flock is at last 18 weeks of age.

To get a recipe on homemade chicken feed for a small flock, read the post here.

Once they reach about 18- 22 weeks, your hens should begin laying their eggs.

Hens lay an average of 5 eggs a week, depending on breed. Making sure your flock has plenty of fresh, clean water and feed will ensure they stay healthy and give the highest output of egg production.

Throughout their laying life, they will need a feed ration of 16-18%. Calcium and minerals should be added as a supplement as well. You can do this by adding crushed oyster shell or giving the hens back their own crushed egg shells. These should be given as a free choice supplement and will help with soft shelled, or thin shelled eggs.

You want to avoid giving layer rations to other types of chickens, such as meat birds due to the higher mineral content. If you are housing a rooster with your flock, however, he will be fine with the layer rations.

Scratch/cracked corn should just be a treat, not their main source of food. Also, be sure not to feed your flock moldy food. Store your feed away from rats, raccoons, and other pests in a closed container if at all possible. You may also want to close the feed up at night completely if mice are an issue on your homestead.

Feeding your flock medicated feed is a personal choice. You can choose either way, and still have a healthy flock. Allow for plenty of fresh water, sunshine and your flock time and space to collect bugs is the best way to get a healthy flock and high quality eggs.

What do you feed your chickens? Be sure to pin this for later!

the post first appeared on thehomesteadinghippy.com See it here

The post What To Feed Chickens For A Healthy Flock appeared first on Homesteading Alliance.

4 Optics That Will Revolutionize Your Survival Rifle

A quality optic for your rifle can be one of the most important upgrades imaginable. However, have you ever thought about optics for your survival rifles?

When looking at optics for these survival rifles, I tend to look at several different features.

Durability is an obvious one. In a survival situation, you won’t be able to replace the optic easily, and you’re probably going to have to expose it to the elements at some point.

Accuracy is another obvious one. However, as I’m sure you’ve seen, most modern optics hold their zero really well, so you probably won’t have to worry about this one too much. It comes more into play when considering that some people just won’t shoot some optics as well as others. It’s a fact of shooting.

Get Free Electricity — And Never Be Without Power!

The last feature that I like is an optic that has an etched reticle or uses fiber optics. This eliminates the need for batteries. I like this due to the fact that batteries may be hard to come by in a survival situation.

Generally speaking, I prefer no magnification for a survival rifle. However, a variable magnification scope that starts at 1x magnification would work just the same. I have found that with enough practice, I am able to accurately and effectively shoot out to 300-plus yards without any magnification. Conversely, shooting at 50 yards and closer with magnification can be very difficult.

Let’s talk about some of our favorite survival optics.

Vortex Spitfire

The Vortex Spitfire is a prismatic scope, so it is extremely compact. It is only four inches long, and weighs in at 11.2 ounces. This compact size is one of the biggest appeals of a prismatic optic. The reticle just uses dual rings, so it is extremely easy to acquire targets. While the reticle is etched on the prism, it also can be illuminated in red or green.

In terms of durability, this one is hard to beat. It is waterproof, fog-proof and shockproof. The anodized finish adds in to this, and the optic can be used in any variety of temperatures.

The eye relief is comfortable, and the scope is parallax free, so you will be able to easily shoot with this optic. I found this to be an excellent, accurate optic, especially when considering the relatively low MSRP.

Vortex also offers a Spitfire prism scope with 3x magnification.

Burris AR-1X

This optic from Burris is another great choice for your survival rifle. It is the same size as the Spitfire, but it is a little bit heavier. The eye relief is also a little bit shorter, so some will not find this as comfortable for shooting.

While the Spitfire was a prismatic sight, this one utilizes lenses. The lenses are fully multi-coated, so you will be able to see more clearly. It allows for a lot of light transmission, so it’s consistently easy to see.

The reticle is slightly more complex than the Spitfire. It uses a large circle, but also includes a bullet drop compensator. On one hand, this will help the intelligent shooter extend his range. However, on the other hand, it may slow down your target acquisition. Similar to the Spitfire, this one has an illuminated reticle that can be either red or green. The black reticle is etched on the lenses, so you don’t need a battery.

This optic will work well on a survival rifle. It is small, durable, and will last for a long while. However, it is slightly more difficult to use, due to the more advanced reticle. As far as price goes, this one is much more affordable than the Spitfire.

Trijicon ACOG

The Advanced Combat Optical Gunsight (ACOG) is very commonly used in the military. This is actually my favorite survival optic, but be warned, it is extremely expensive.

This optic is my favorite due to how durable it is and the fact that it uses fiber optics. There are never any batteries involved.

In terms of magnification, there is a wide variety available. The scopes are all fixed magnification, and they start at 1.5x magnification and go up to 6x magnification. For the survival rifle, I recommend 1.5x or 2x. Maybe 3x magnification, but it will take some getting used to at close range.

Similar to the Burris optic, these optics utilize classic lenses as opposed to the prism used in the Spitfire. They are extremely durable, as evidenced by the military using them in combat. The reticles of each ACOG are slightly different, but most of them incorporate some bullet drop compensator. I found them to be easier and quicker to use than the Burris optic.

Iron Sights

This one should be obvious. No matter what optics you decide to use on your rifle, having iron sights as a backup is absolutely crucial. Now that almost all optics rely on electronics, and use some form of illuminated reticles, it is very important to have that manual backup.

I can’t imagine having a survival rifle without iron sight backups. I recommend shooting with your iron sights every once in a while, just in case you ever have to use them in a survival situation.

What are your favorite optics? Share your tips in the section below:

This article first appeared on offthegridnews.com See it here

The post 4 Optics That Will Revolutionize Your Survival Rifle appeared first on Homesteading Alliance.

Why Free Animals Are A BAD Homestead Investment

Image source: Pixabay.com

Most Free Animals Are Male

Most of the animals you’ll see available for free are males. From intact buck goats and wethers to roosters, buck rabbits and drake ducks, nearly every farmer deals with an overabundance of boys from time to time.

So, why would you not want to take advantage of free males, especially if it’s a type of animal you might be planning to breed?

First, males given away for free are often not of the highest quality. They may be lacking proper bone structure, muscling, libido or markings. Even if they have these things, they may be past their prime, meaning low settling rates from either a low sperm count or diminished breeding hormones.

Second, males take more planning to house and care for. This is especially true of livestock that have a particular breeding season. Male goats can be quite destructive during the fall rut, even when running with a herd of females. Turkey toms that co-exist with other poultry through most of the year can be particularly aggressive at the beginning of the breeding season and may need to be separated.

Unsexed or Incorrectly Sexed

Craigslist and sale boards are full of free animal posts that start with the story of “we brought home two critters that were supposed to be males, and turns out one was a girl” or vice versa. Regrettably, not everyone who has livestock knows how to determine an animal’s sex. To get around it, animals will often be listed as “unsexed,” “straight run,” or as a “must take all” grouping. Sometimes an uneducated owner will just take a guess on sex entirely and give it away.

Be Prepared: Get The Ultimate In PORTABLE Solar Power!

To avoid unexpected complications down the road, know how to sex the animal you are planning to take in, or have a friend or family member that knows how help you.

Hidden Illnesses

Depending on the species, a critter may be carrying something that is infectious to other animals or even to others of its own kind.

A good example of this is chickens with fowl pox. When we lived in Mississippi, it was common for free chickens to be carrying the pox. With the pox, the chicken is fairly asymptomatic, meaning it doesn’t usually display the same blisters, respiratory issues or diminished appetite of other birds. What you will notice is that hens infected with it stop laying while the virus runs its course. However, like chicken pox in humans, it spreads easily, and will readily transmit to other poultry species where it does considerably more damage. From our experience, ducks and turkeys especially will develop lesions and blisters on their heads, around their eyes, and near their reproductive organs. In mild cases and healthy adult flocks, the effects can be pretty minimal, but fowl pox will easily kill chicks, juveniles, and can even cause the loss of fertility in adult breeders.

It’s not just chickens, of course. Often free rabbits are active carriers of Pasteurella, and your free goat may be positive for CL, CAE or even Johne’s Disease.

You can minimize the risk of bringing an infected animal home with a good biosecurity plan and a minimum quarantine of 30 days.

Reproductive Issues, Genetic Anomalies, or Bad Mothers

As an animal lover, we all get attached to our critters in one way or another. Unfortunately, this sometimes means that people will give away an animal that should really be culled due to reproductive problems or being known carriers of genetic issues.

Be sure to ask a lot of questions, especially if the animal previously had offspring. There are bad mothers in every species, from rejecting offspring, being inattentive, not having enough milk, or even killing them at birth.

Behavior Issues

Unfortunately, not everyone is honest about why they are getting rid of an animal. From being an escape artist, hating men/women, or attacking anything smaller than itself, critters with behavioral problems are often offered up as freebies for the unsuspecting.

A friend once brought home a beautiful one-year-old boer goat doe. She was purebred but given away without papers. The original owners had told my friend that they were just short on space, so they needed her to go, and that was why they had her penned up in a horse stall instead of out with the other goats. The doe was healthy, but my friend put her through quarantine anyway, though there were no issues. Once put out with the herd, this little doe became nothing but a problem child. She would escape from any paddock no matter how good the fence; she was insanely aggressive at feeding time; she would go out of her way to knock younger goat kids down. Then she turned on my friend’s 12-year-old granddaughter. It was the human aggression that earned the doe a trip to the butcher.

Bad Time of Year

Lastly, there is always an uptick in free animals during the winter months. This is mostly due to the increased costs to feed and/or the hassle of taking care of livestock during the cool, wet months. If you are willing to deal with a new addition to your homestead and have the facilities to keep it, be sure that you can afford to feed it. Both drought and wild fires can have impacts on the price and availability of everything from hay to bagged feeds.

With a little planning and know-how, you can avoid these free animal pitfalls. While we all enjoy adding livestock to our homesteads, just be sure they don’t end up costing you more in the long run.

What advice would you add? Share it in the section below:

This article first appeared on offthegridnews.com See it here

The post Why Free Animals Are A BAD Homestead Investment appeared first on Homesteading Alliance.

10 Stockpiling Tricks That Will Make Your Food Last Longer

U.S. Air Force photo by Senior Airman Zachary Hada

You would think that stockpiling food would be easy, right? Just buy a bunch of food, stash it away somewhere where it won’t be eaten, and you’re good, right? Uh, wrong. Building a stockpile and making it last is a lot harder than it looks.

The basic problem is that food, as it grows naturally, isn’t intended to be stored for years. For that matter, food the way it’s package at the grocery store isn’t intended to last for years. The manufacturers of that food assume that you are going to eat their products within a few months — and they pack it accordingly. So, if you want to keep your food around longer than that, you’re going to have to do something with it yourself and not trust their packaging.

The good news is that people have been hoarding food for millennia. Preserved food has been found in the various tombs of the pharaohs, demonstrating that mankind has been preserving and storing food for much longer than we would expect.

Fortunately, you and I don’t need to make our food stockpile last for thousands of years. It behooves us, though, to make sure that we store our food as well as possible, ensuring that we will have something to eat when everything suddenly goes wrong.

Here’s 10 ways to make your food last as long as possible:

1. Rotate Your Stock

One of the easiest ways to ensure that your food stocks last is to borrow a page from the stores you buy your food in. They have a rule called “first in, first out.” This merely means that they sell the oldest first. You should use the oldest first. If you are stockpiling a year’s worth of food and you always use the oldest can, box or bag of a certain item, you’ll never have anything in your stockpile that’s more than a year old.

This is especially useful for things you use all the time, like spaghetti sauce. To ensure that you’re actually using the oldest first, make a habit of marking the month and year of purchase right on the label. That way, you have a quick reference and don’t have to try and remember which style label is older than which.

2. If It’s Wet, Can It

Canning is one of the most effective and long-lasting means of food preservation out there. So make good use of it. The basic rule of thumb is that if a food item is wet, it can be canned. So, start canning meat loaf, extra produce from your garden and the fish from your latest fishing trip. If canned, it can stay usable in your survival stockpile for years. Some canned foods that are over a century old are still edible and nutritious.

3. Salt Does More than Flavor

Salt is nature’s preservative. So is sugar for that matter, although we use salt for preserving more than sugar. Other than fruit, just about anything you are trying to preserve probably needs salt added. It doesn’t matter if we’re talking about canning food, dehydrating it, making your own cold cuts or smoking a ham; salt is the key to ensuring that bacteria don’t spoil your food.

4. Overdo it With Oxygen Absorbers

If you’ve heard about packing dry food in aluminized Mylar bags and five-gallon buckets, then you’ve probably heard about oxygen absorbers, too. These are added to prevent food from oxygenating and losing its freshness. But oxygen absorbers also make an inhospitable environment for bacteria and insects, both of which need oxygen. So, when adding oxygen absorbers to dry foods that you’re packaging for your stockpile, go for a bit of overkill. Don’t just use the minimum recommended; step it up a bit and ensure that the oxygen has really been absorbed.

More than anything, this is about ensuring that insect eggs can’t hatch, creating a population of insects inside your preserved food. Any insects which did manage to hatch from their eggs won’t be able to survive without oxygen.

5. Don’t Forget the Silica Gel

Few people mention it, but adding a packet of silica gel to dry foods when packaging them for long-term storage can help ensure that they stay fresh. These foods turn stale when they absorb moisture. While you probably already try to make sure that there is no moisture in the container, when packaging those foods, things can happen. The addition of a silica gel package can ensure that any moisture which does get into the package is absorbed by something other than the food.

6. Keep Track of it All

Make sure that you develop and keep a good spreadsheet of everything you’ve got in your stockpile. This should mention package size, quantity and the location or locations you have it stored. Always be sure to update your list. Don’t just have that spreadsheet on your computer, either. Print a hard copy and keep it in a notebook.

7. If You Use it, Replace it

This is one I have to keep after my wife about. It’s easy to just dig into your stockpile if you need something and pick an item without realizing it’s the last one. Make a note so that the next time you’re shopping, you can pick up a replacement and put it in your stockpile.

8. Keep it Cool

Heat will cause many foods to alter while stored. It speeds up chemical reactions and in extreme cases can slow-cook the food. Always try to keep your food stored in cool, dry places rather than in hot ones. The attic really isn’t a good place for food storage for this reason. You’re better off hiding it under the bed or putting it in the basement.

9. The Tougher the Better

When it comes to packaging, the tougher the better. Never settle for “just good enough.” Go for something that’s overkill. I can show you five-gallon bucket lids which have been gnawed through by rodents. Bacteria and insects aren’t the only things that want to eat your food stockpile; there are plenty of mice and rats in the world that would love to have a picnic at your expense, too.

10. Spread it Out

Whatever you do, don’t store all your food stockpile in one place, or even all of one type of item in one place. Let’s say that your basement is your main food storage area. That’s probably pretty good. But if your basement floods, you aren’t going to have access to that food. So, make sure that some of it is stored under the bed or in the upstairs hall closest.

For that matter, you should have one or two food caches off-site, as well. You never know what could happen. The people of Southeast Houston probably weren’t expecting to have to abandon their homes before Hurricane Harvey came along.

What advice would you add? Share it in the section below:

This article first appeared on offthegridnews.com See it here

The post 10 Stockpiling Tricks That Will Make Your Food Last Longer appeared first on Homesteading Alliance.

Sunday, February 18, 2018

28 Heartwarming DIY Homemade Candles That Will Make You Happy

It is extremely rare that you will come into my house and I won't have at least one candle burning somewhere within it. For me, a candle is more than just something that smells nice, it can totally adjust the feeling of a room. By choosing your favorite scents, or seasonally appropriate ones, you can make a room feel more welcoming, and of course, give it a beautiful warm glow.

DIY candles can also be a great gift. Yes, you can buy them in many stores, but by making your own unique, homemade one in your loved one's favorite scent, you are bound to make their smile even wider.

1. Poured Mason Jar Candle

I love using mason jars for little DIY touches around the house, whether it's to hold pencils at my desk or as a quirky little flower vase. These homemade Poured Mason Jar Candles are simple but very effective and would be a lovely addition to any room.

If you are making this as a gift for someone then be sure to choose their favorite color or a color that you think would match well in the room where they spend the most time in. I love how large these candles are, of course, you could adjust that depending on what size of jar you use, but the ones in this example look like they would last ages. Remember that the color will get lighter as the candle cools, so don't be afraid to be a bit heavy handed with it.

2. Chocolate Brownie Candle

Of course, this Chocolate Brownie Candle isn't edible, but it certainly sounds like the scent might tempt you. Even people who aren't the biggest fans of chocolate, of whom I am yet to meet more than a couple, can't deny that the smell is delicious, who wouldn't want that wafting through their house?

This recipe is incredibly simple to follow, and you could use it to create a wide range of candles by simply switching out the wax cubes for a different scent. Pop this candle on in the kitchen and you might even be able to fool people that you had spent the morning cooking up a batch of brownies like the domestic goddess that you are.

3. Teacup Candles

These Teacup Candles are just the sweetest thing and would look so gorgeous scattered across a table at an afternoon tea, or even just around the house for use whenever you fancy.

I love how easily customizable the candles are. You could pick any teacups you want, going for something pretty and vintage like this example or something more quirky and modern. That also makes this idea a great one for up-cycling unused cups and mugs. The color and scent are totally up to you, although I think it could be pretty cool to play around with some coffee- or tea-like scents to really stick to the theme.

4. Funfetti Candles

The effect that covering the outside of this candle in sprinkles gives it is so bright and fun, and this is most definitely a gift that I myself would love to receive. It's bound to make anyone smile, especially if you dressed the jar up a bit with a pretty ribbon.

The multicolored sprinkles in this Funfetti Candle look really effective, but it could also be a lot of fun to play around with different ones. You get hundreds of different sprinkles in the baking aisle of any store nowadays, of all shapes, sizes, and colors, so don't hold back from trying out something different. I love the fact that this candle is cupcake scented, and think it would make the owner feel like it was their birthday every time they used it.

5. Pumpkin Spice Candle

I feel like you can make absolutely everything related to pumpkin spice nowadays, but I do really love the scent so I am not against it. I am definitely not against this Pumpkin Spice Candle, which would create the most gorgeous and cozy scent imaginable.

As silly as it may sound, I honestly believe that on cold stormy evenings, lighting candles with warming scents can help turn a horrible evening into a relaxing and comforting one. This DIY looks simple to follow, and because it uses actual pumpkin spice the scent will be authentic. I think this candle would be appreciated by anyone, especially those lovers of all things fall and cozy.

6. Rosemary and Grapefruit Candle

Even if these candles didn't have the most incredible scent I would still be totally in love with them, just look at all that pretty. Of course, the ribbon and rosemary would need to be removed before lighting, but this would be the loveliest thing to hand someone as a gift.

I can't recall having ever come across a Rosemary and Grapefruit Candle before, but it sounds like the perfect mix of herbal, fresh and sweet. You could use any container you want, but I think something like the gold ones used here makes the candle look even more luxurious and store-bought.

7. Pressed Herb Candles

These Pressed Herb Candles would make beautiful gifts, that is if you can bear to give them away after making them.

I love the fact that, when lit, the glowing of the candle shows through the wax and makes the herbs stand out even more. You could get really creative with how you decide to decorate your candle, sticking to a more simple design with one or two herbs or going all out with many different varieties. These would be perfect for anyone who loves their garden, and I don't know what it is about it but I see this working best in the kitchen.

8. French Vanilla Candle

Imagine filling a hot bath right up to the top with bubbles, popping in your favorite bath bomb and lighting a few of these French Vanilla Candles around the bathroom. I almost feel perfectly relaxed just thinking about it, blissful.

One of my favorite things about this candle is that it is scented by entirely fresh ingredients, with the vanilla beans and coffee beans, meaning that you will get that beautiful scent coming through and almost believe that you're sitting in a coffee shop in Paris. Such a lovely scent obviously deserves to be held in something equally as lovely, and the little china pot they have used in this example is a perfect match for me.

9. Strawberry Lemonade Candle

I love my sweet and fruity scents, so I am definitely sold on this Strawberry Lemonade Candle. This would be absolutely perfect to light on a summer's evening, or equally on a cold winter's one to make you forget about the cold outside.

The vibrant pink color is really cool, and I can imagine younger girls being really into it, I know my little sister certainly would be. The DIY is easy to follow, so you could even get them involved in the fun of making it too. The jar almost makes it look like an actual strawberry lemonade that you might buy at a trendy bar or cafe, which I think only adds to the fun feeling of it.

10. Champagne Flute Candles

What could be more romantic than a homemade dinner, the table set with your best crockery and adorned with these Champagne Flute Candles?

This candle recipe is incredibly basic, with no scent or color, meaning that you are entirely free in adding your own. You could utilize this DIY in many ways, experimenting with objects that could be used as candle holders other than champagne flutes. I must admit that I think it's a shame the wax doesn't stay the same color once it dries as it does when it's melted because in that state it really does looks like real champagne.

11. Citronella Candles

Citronella Candles are an absolute savior when it comes to warmer nights. All you want to do it sit outside and blissfully enjoy the evening in great company, but instead, you are attacked by pesky mosquitoes.

It never occurred to me that I could actually make my own citronella candles, but from now on I will definitely be making sure that I have a batch on standby ready for whenever I might need them. I love the look of these candles in tin cans and think it gives a really cool rustic feel to it, much more stylish than a bulky citronella candle you would buy from the store. This recipe even has extra scents added in, so you will have a candle which is both effective and delightful.

12. Pineapple Candles

These super cute Pineapple Candles could double up as fun room decor, that's how great they look. I especially love the fact that this DIY has gone to the effort of making little green leaves for the top of the jars to perfectly mimic a real pineapple.

You could just make the candle itself of course without going into decorating it, but I know I wouldn't be able to hold myself back considering how sweet it looks when all done up. The contrast between the bright yellow and green is eye-catching, and these would look really good as decoration at an evening garden party, while simultaneously giving off the most deliciously tropical scent.

13. Pressed Flowers Candle

I don't think I have ever seen a candle quite as pretty as this one. I would pay a fair few dollars for this in a store, never guessing that it was a relatively easy DIY to tackle for yourself.

This Pressed Flowers Candle DIY doesn't include instructions on how to make the candle itself, but luckily for you, you are currently looking at a list that is full of them. You could apply this pressed flower design to any candle, homemade or store bought. I think this is so incredibly beautiful, and anyone would be so pleased to receive it as a gift. You could be organized and create a linear pattern or go crazy and let your imagination run wild with different flowers and designs. Let's not lie, the latter sounds far more fun.

14. Chai Tea Latte Candle

I am not the biggest fan of coffee, and on the rare occasion that I do drink it, it tends to be something highly sugared with some vanilla or caramel flavoring, so not real coffee. If I am ever out at, or passing, a coffee shop, what I go for instead is a chai tea latte.

The scent of a chai tea latte is almost half the reason why I love it so much, it just smells delicious with all those warming spices. I absolutely love how they have presented this Chai Tea Latte Candle, and I don't think I have ever seen wax being whipped in order to create an effect like this. This would look so cute set out on display, just be careful you don't forget that it isn't real and attempt to take a sip of it by accident.

15. Seashell Candles

I have been the world's biggest lover of the beach for as long as I can remember, and when I was asked the classic ‘what do you want to be when you grow up?' question as a little girl I would undoubtedly reply ‘mermaid' every time.

My grandparents live by the beach and to this day we will go down and collect shells on the beach on our walks. I have so many shells in my collection now but have never known what to do with them. That was until I came across these Seashell Candles. This DIY is a beautiful way of displaying the shells without ruining them, and a cluster of these in all shapes and sizes would make the most beautiful table centerpiece.

16. Lavender Rosemary Candle

There are both the essential oils and the dried herbs of both lavender and rosemary in this candle, which means that its scent is most likely to waft beautifully around the house, a characteristic I definitely appreciate in my candles. I like that you can see the bits of real rosemary and lavender in the melted wax as the candle burns too.

Anyone who is a fan of herbal or calming scents will absolutely love this Lavender Rosemary Candle, and I think even just making it would be a treat for your nose. This candle would go well in any room of the house, whether it's in the bedroom to send you off into a deep night's sleep or in the hallway to welcome guests into your exquisite smelling home.

17. Glitter Candles

I absolutely love a bit of glitter. Actually, that was bit of a lie, I absolutely love a lot of glitter. I can imagine younger girls would absolutely love these, so they would make a great gift to little sisters or cousins on any occasion.

These Glitter Candles are so pretty, and a lot of fun. I have seen things like this in stores, but they would be a lot more fun to make yourself considering that it would allow you to pick your colors and jars. The metallic colors used in this example are extremely effective and pretty, but I must say I love the idea of having at least one absolutely full of multicolored glitter.

18. Wax Free Candles

According to this DIY, making these Wax Free Candles means that your candle will last far longer than it would if it were made of wax, which obviously melts.

This recipe uses vegetable shortening instead, and the only wax included is that from the crayons used for coloring, which you could easily swap out for food coloring if you would rather. The scent and color are just as easy to adjust in this recipe as they are in any other. There are even instructions for how to make this candle in the microwave in a mere few minutes, so if for any reason you are in need of a few candles in a hurry then this is definitely the DIY for you.

19. Candy Cane Peppermint Candle

I am fully aware that the festive season is over, but there is no harm in keeping this recipe tucked away until it comes around again, which it will far faster than we expect no doubt.

You would struggle to find a candle more festive looking than this Candy Cane Peppermint Candle one, I especially love the fact that it is layered to look like a real candy cane. I have had peppermint candles before, but none quite like this one. The scent of peppermint is always so fresh, so I don't think you should feel restricted to only making this in the holiday season. One thing I think I might adjust a tad when making this would be to add a little more red wax, just to get a stronger contrast between the red and white layers.

20. Massage Candle

Professional spa massages can be incredibly pricey, so why not make up a little spa gift basket for your special someone and include one or two of these Massage Candles.

When I first read that the idea of this candle was to pour the wax onto your skin I wasn't too sure, but after looking into the recipe and all the nourishing oils and ingredients I am desperate to give it a go. I like that this recipe gives you some essential oils to add but doesn't specify which ones, meaning you can be totally free in your choice, maybe even mixing and matching more than one to create the perfect, relaxing fragrance.

21. Grapefruit Candle

I find the scent of grapefruit so energizing and refreshing, so I really love the idea of having this Grapefruit Candle burning either in my bathroom or bedroom in the morning as I get myself ready for the day.

There are a number of other deliciously fresh scents going on in there along with the grapefruit, like orange, lemon, and ylang-ylang, which is a new favorite of mine. This citrus-scented candle is a refreshing change from other more warming, sweeter scents, which I personally really like. I also love the fact that this DIY tells you how to make the little wine glass turned candle holder that the candle sits within because I love how simple yet stylish it looks.

22. Apple Pie Candle

Here's another delicious candle that would trick any guests into thinking that you frequently spend your mornings casually baking cakes and pies for your family.

Apple and cinnamon are a match made in heaven, both in taste and in scent, so this Apple Pie Candle is bound to smell absolutely delightful. This method is straightforward and very easy to follow, so perfect for a last minute gift or a candle making beginner like me. I am also really fond of the mason jar they have used in this example, it looks like a really good size that would last a decent amount of time. If you'd rather a few smaller candles as opposed to one big one then that'd be easy to do too.

23. Color Block Crayon Candles

I can get over how well these Color Block Crayon Candles have come out, especially considering how simple they are to make. I have a feeling that more than a few crayons might be about to go mysteriously missing around my house…

I have seen a few candle DIYs that use different colors to create layers, but they are usually straight so I really like that they have gone for something a little bit different here with the slanted layers. You can get crayons in just about every color so there is no limit on how imaginative you can be with the combinations you try out in your own candles. When unlit these candles would still look incredibly cool as room decor, and you could use very neutral colors just as easily as you could bright ones so that you can adapt them to any room in the house.

24. Ice Candles

I have never seen anything quite like these Ice Candles before, and when I first stumbled upon this DIY I just had to know how they were made.

I really like the fact that this DIY can also be made with old candles, to freshen them up and give them a new lease on life. To make these ice candles you basically put some ice cubes in the bottom of a milk carton and pour hot, melted wax over the top of them, meaning that the wax holds the shape of the ice as it solidifies. The DIY gives a far better and more detailed explanation than I just did of course. It gives the candles the most interesting appearance and is far more simple to do than I imagined at first glance.

25. Satsuma Candles

As far as homemade candles go, the Satsuma Candles are pretty genius.

I would never have thought to use the peels of satsumas as candles, but I am most definitely going to start doing it as I can just tell that the scent they'd give off would be absolutely amazing, and so fresh too. I love how natural these look, and because of how inexpensive and easy they are to make you could throw them out after one use and make more without it hurting your pockets. I would be interested to see if this technique would work with other citrus fruits like lemons or maybe even grapefruit.

26. Watermelon Candles

How cute are these little Watermelon Candles, with all the colored layers and little seed details? Imagine having these set out along with some of the pineapple ones, now that would be the ultimate garden party set up.

Even if you didn't want to make these candles look like watermelons, though I'm not sure why you wouldn't, you could take inspiration from this DIY and make fun layered candles of any color you want. These would be a great addition to an otherwise neutral space, adding a little pop of color. I think I might make a couple and have them sitting on my desk, I always like to have candles there for when I'm working and these ones would undoubtedly put a smile on my face.

27. Cookie Cutter Candles

You could have a lot of fun with making these candles, and you are only really limited by the number and shape of cookie cutters you can find. This would be a really fun DIY to get the kids involved with, it is obviously not the best of ideas to let them loose with hot wax but they could enjoy choosing the shapes and colors.

These Cookie Cutter Candles could be adapted to suit a specific celebration based on the shapes you use, or you could have simple shapes around the house whenever you like.

28. Cinnamon Candle

In my opinion, you can't really go wrong with the sweet, spicy scent of cinnamon. It isn't a scent that I would wear on myself, but I would be perfectly happy if my house smelled like it all the time, and I'm hoping that this Cinnamon Candle will take me one step closer to achieving that. You get a double hit of cinnamon here, with both the essential oil and the ground spice.

I absolutely love that the cinnamon settling at the bottom of this candle creates a natural ombre effect, a candle characteristic that I will now not have to pay extra at a store for. I love the rich caramel color that this has when it is melted and am glad that it still maintains a hint of that in once cooled.

Now It's Your Turn

Whether you want to make one of these homemade candles as a gift, or on any other day for that matter, or if it's a way of treating yourself, you can't go wrong with any of these incredible DIYs. There really is something for everyone, from those who would prefer something relaxing and herbal to those who love their sweet and fruity scents.

I personally love warm and comforting scents so there are quite a few standing out to me, like the Pumpkin Spice Candle or the Chai Tea Latte one. I also love how fun the Color Block Crayon Candles look, and would love to play around with different colors and combinations.

Which of these homemade candles would you love to receive this February? What kinds of scents do you tend to lean towards when picking your candles?

This article first appeared on morningchores.com Original Article

The post 28 Heartwarming DIY Homemade Candles That Will Make You Happy appeared first on Homesteading Alliance.